

React Quickstart
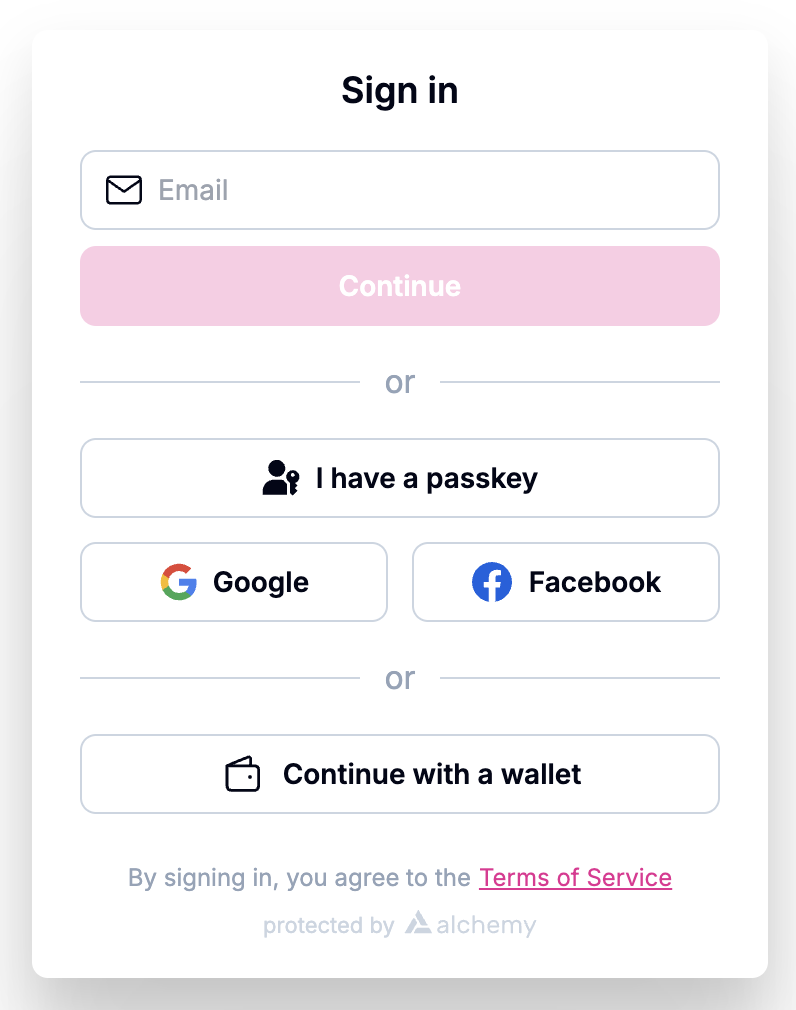
In this guide, you'll create an embedded wallet including sign up with email, passkey, and social login for smart accounts, connect wallet for existing EOAs, and seamless transactions with gas sponsorship.
Below you'll find guides for:
- starting fresh with a new NextJS template
- integrating into an existing React project
New NextJS project
1. Create a new NextJS app using our template
For a simple end-to-end example, we will spin up a new NextJS app using our template.
yarn create next-app account-kit-app -e https://github.com/avarobinson/account-kit-quickstart2. Get your Alchemy API Key
-
Get your API key by creating a new app in your Alchemy Dashboard
-
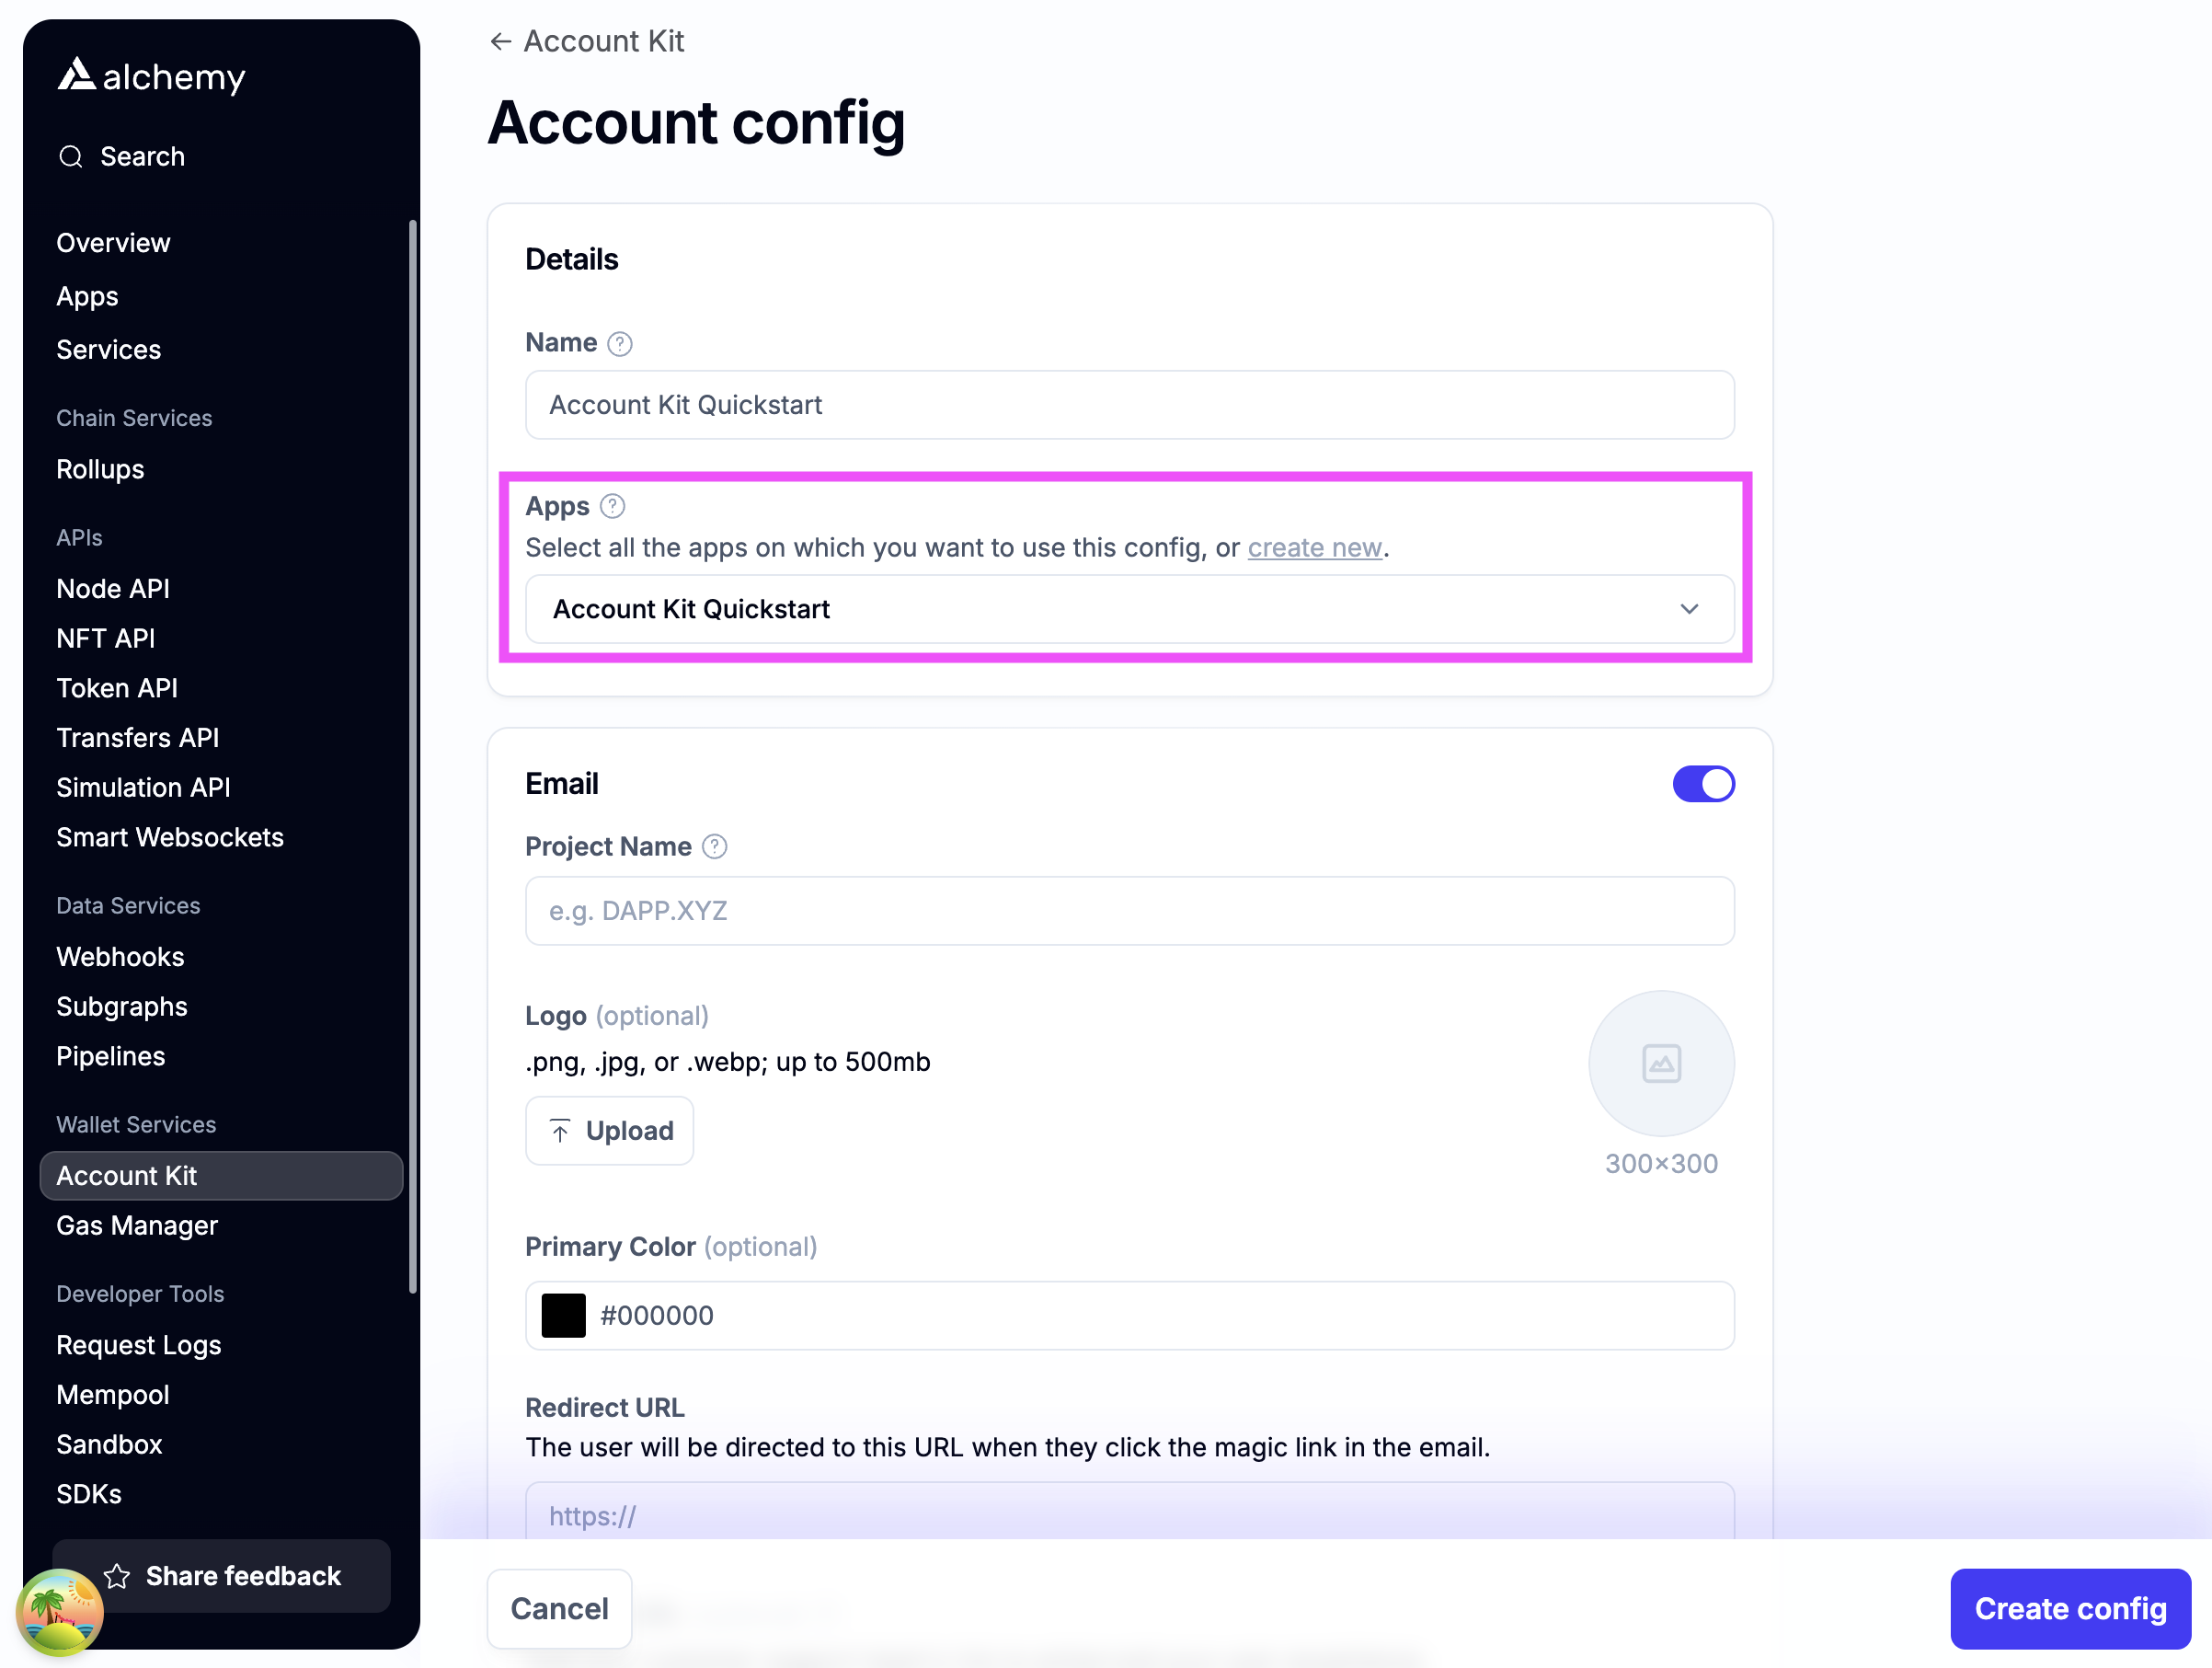
Create a new account config in your Account Kit Dashboard
-
Apply the config to your app from step 1
-
Enable authentication methods you want to support.
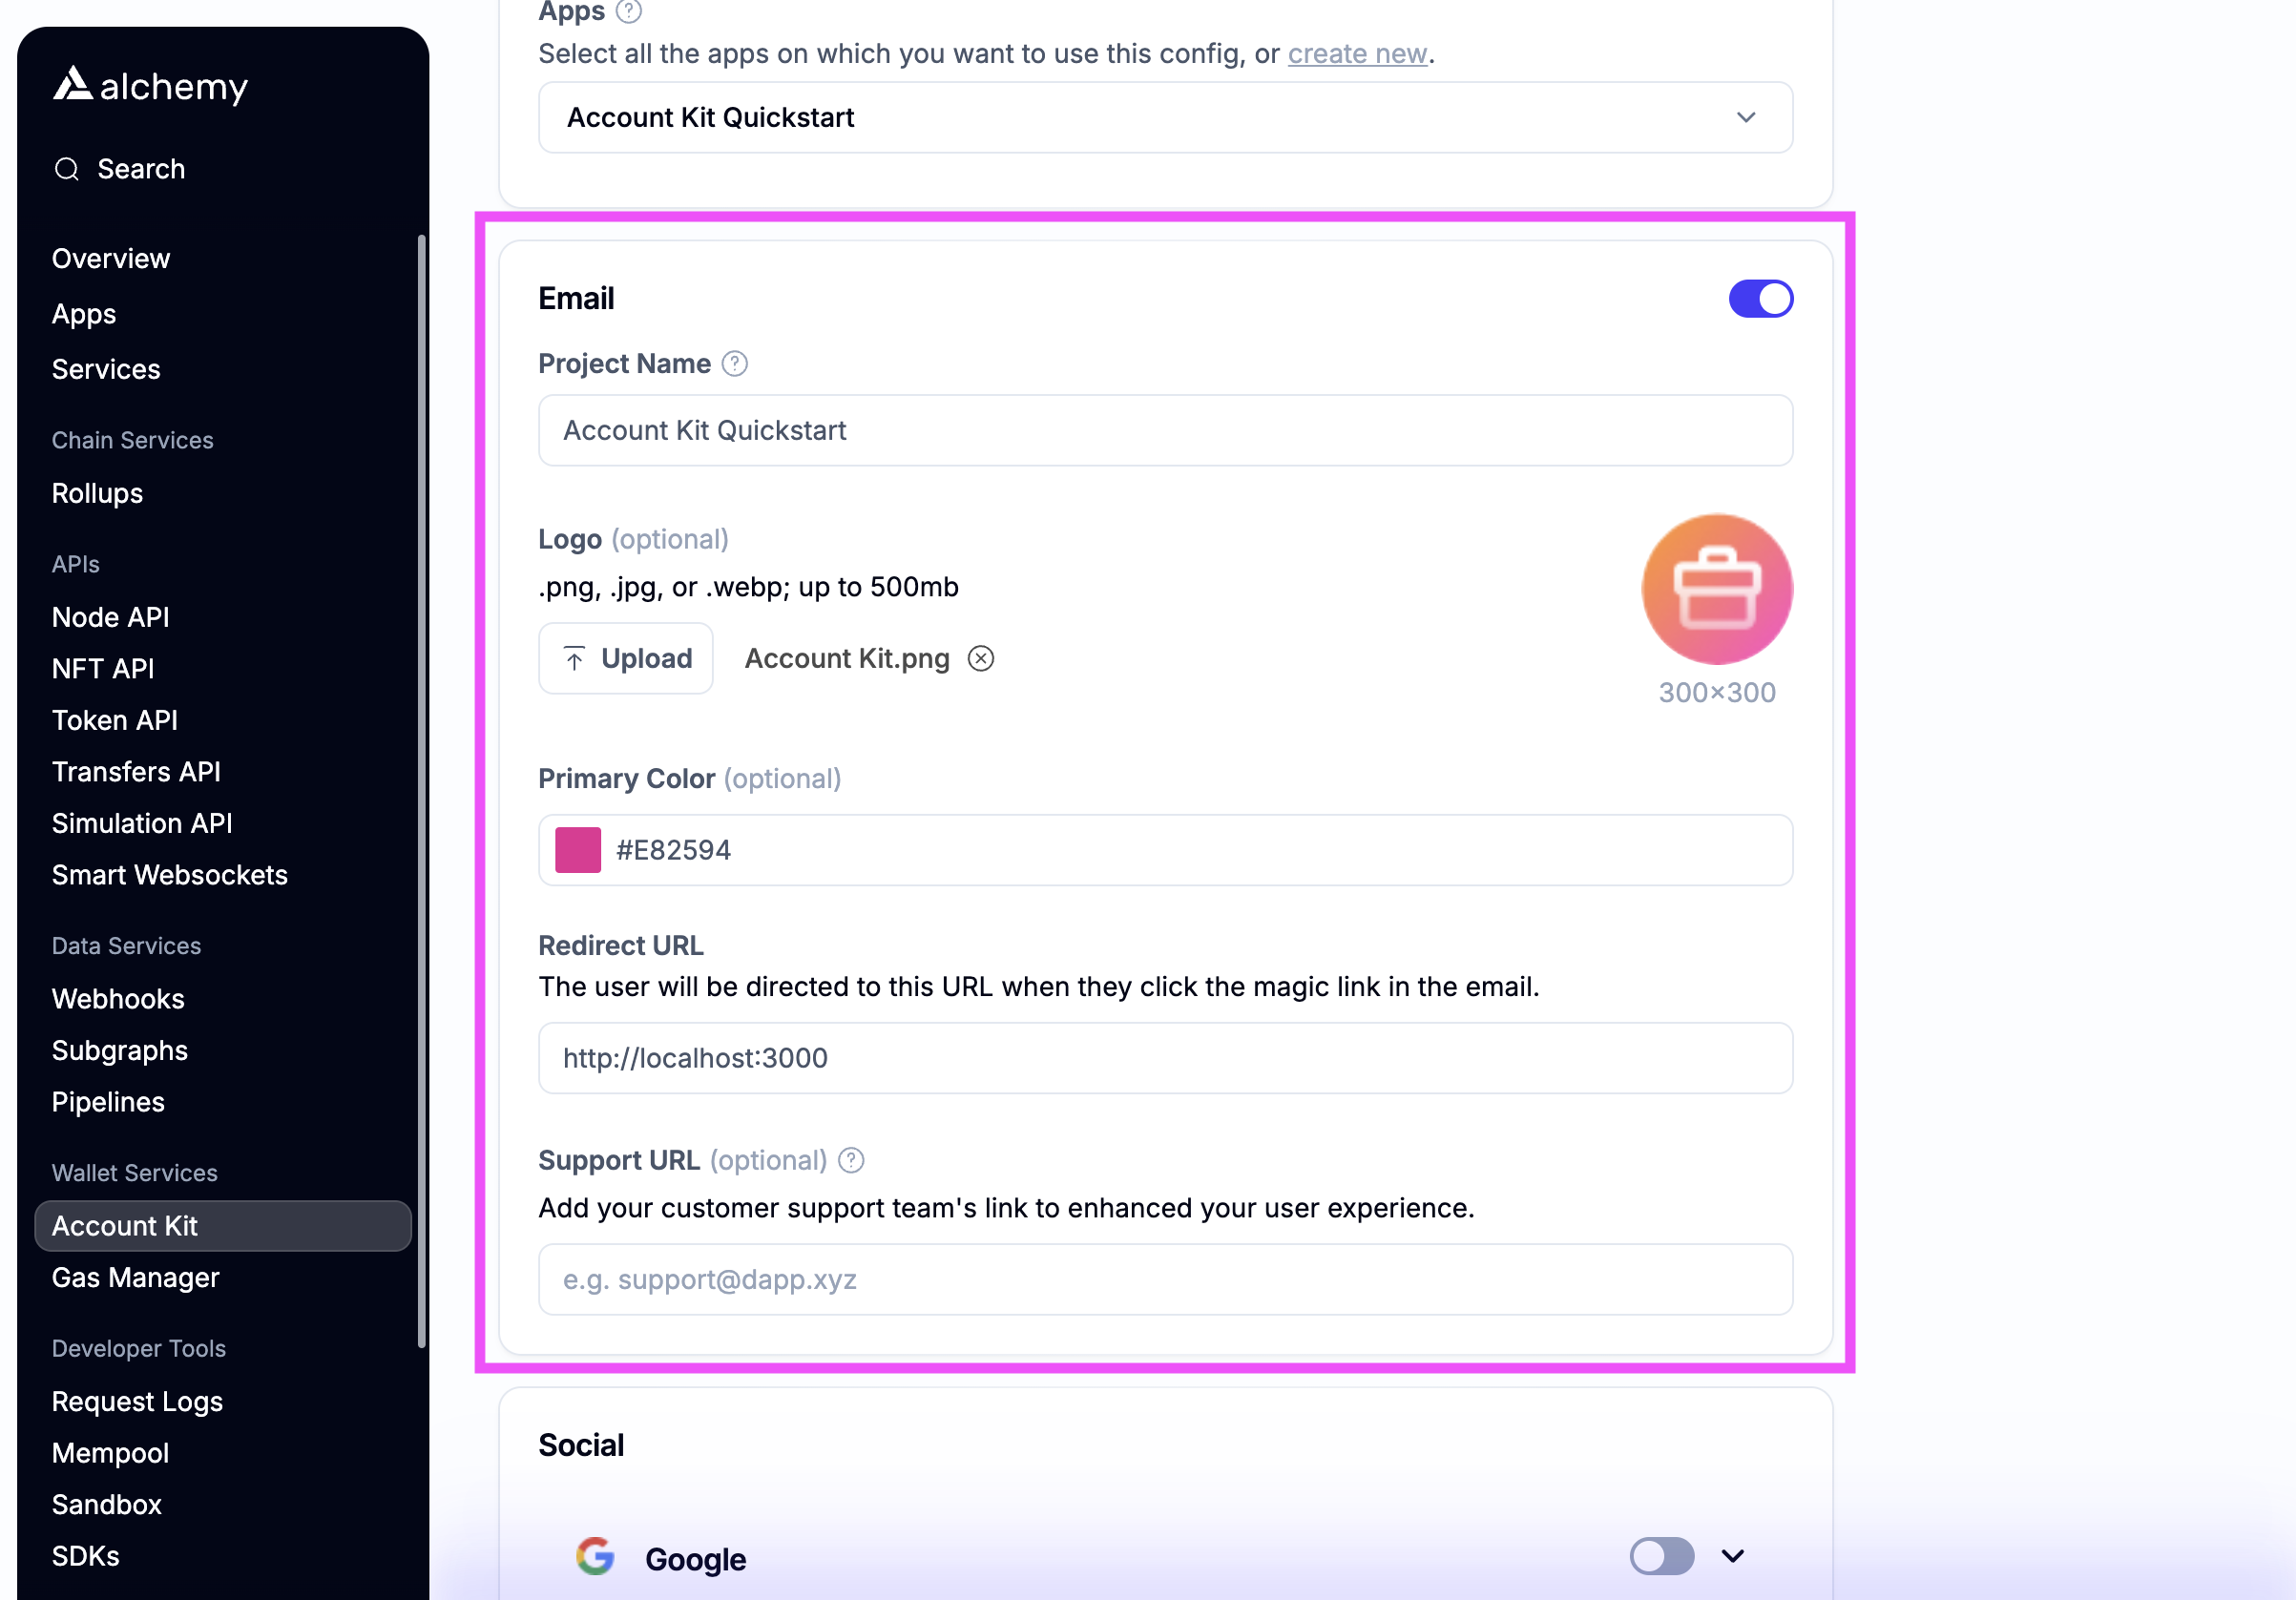
Email authIf you want to use email auth, toggle on email.
- For testing, use http://localhost:3000 as the Redirect URL (Note http not https)
- The user will be redirected to the Redirect URL if you use the magic link email flow
- Optionally stylize ✨ the email with your brand color and logo!
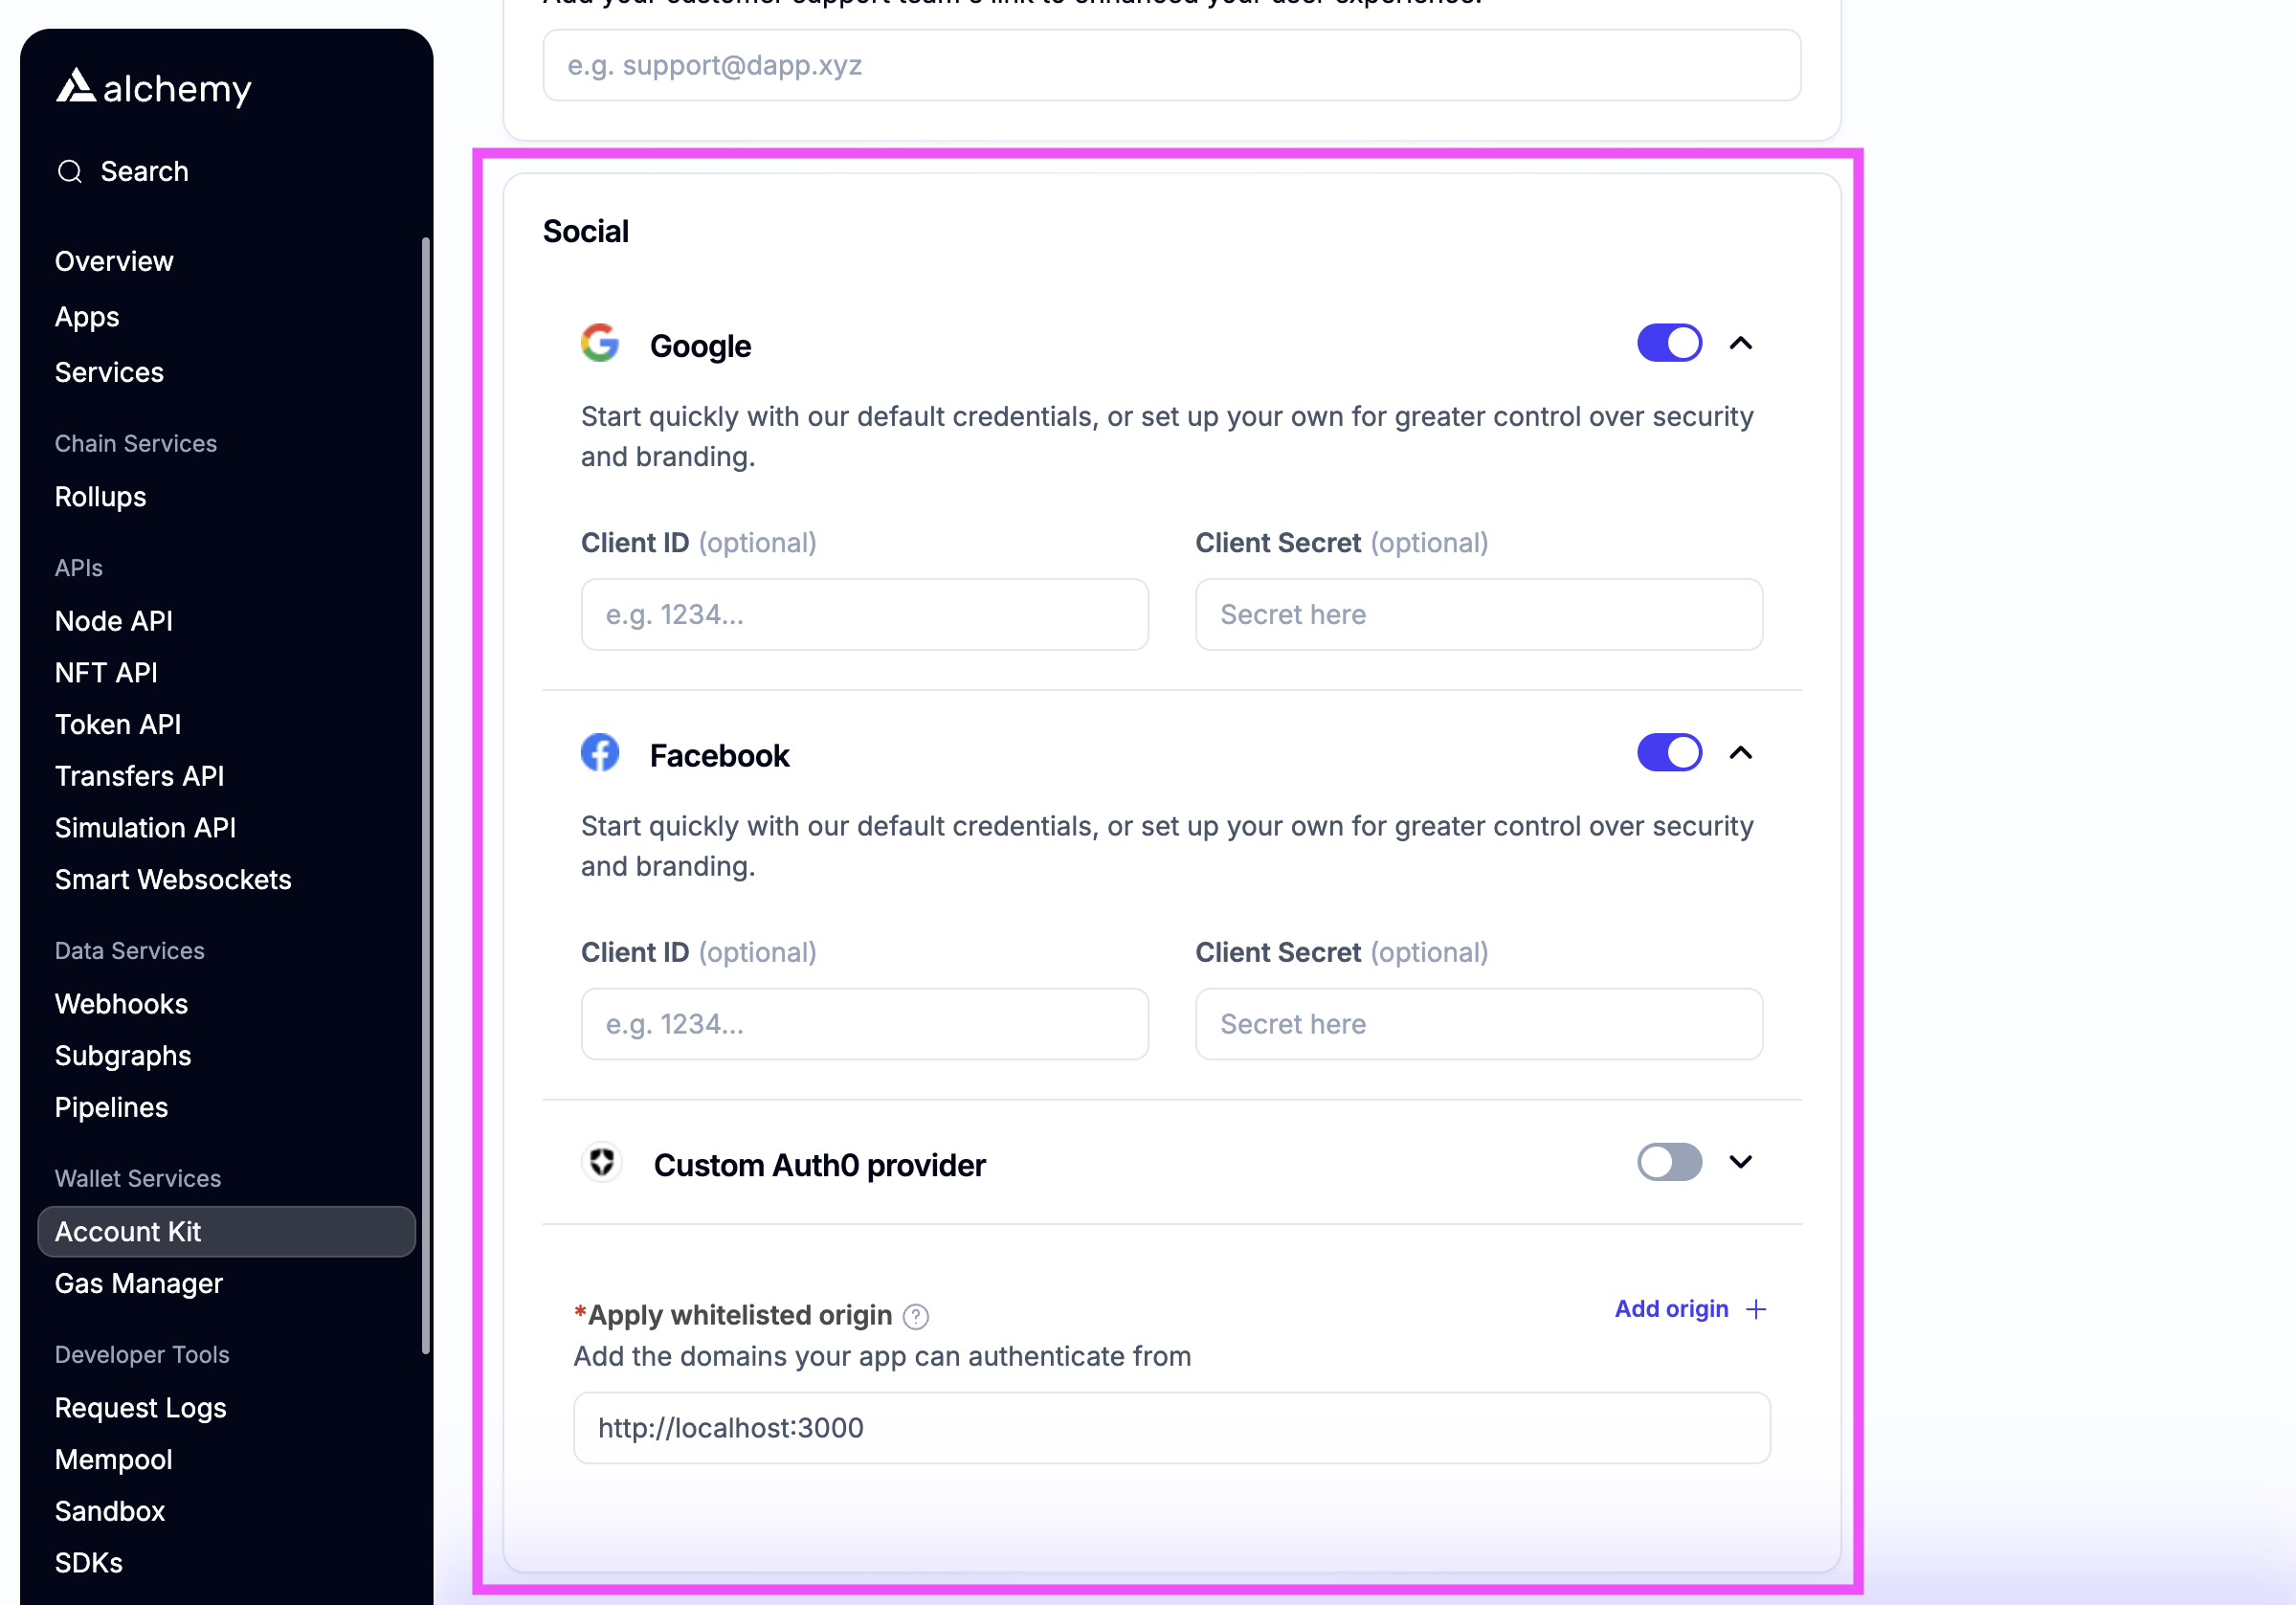
Social authIf you want to enable social login, toggle which auth providers you want to support.
-
For testing, add http://localhost:3000 as a whitelisted origin
-
Add the link that your dapp will be running on to the whitelisted origin list
-
Optionally enter your own OAuth credentials or use our defaults
-
-
Create the config and copy the API Key
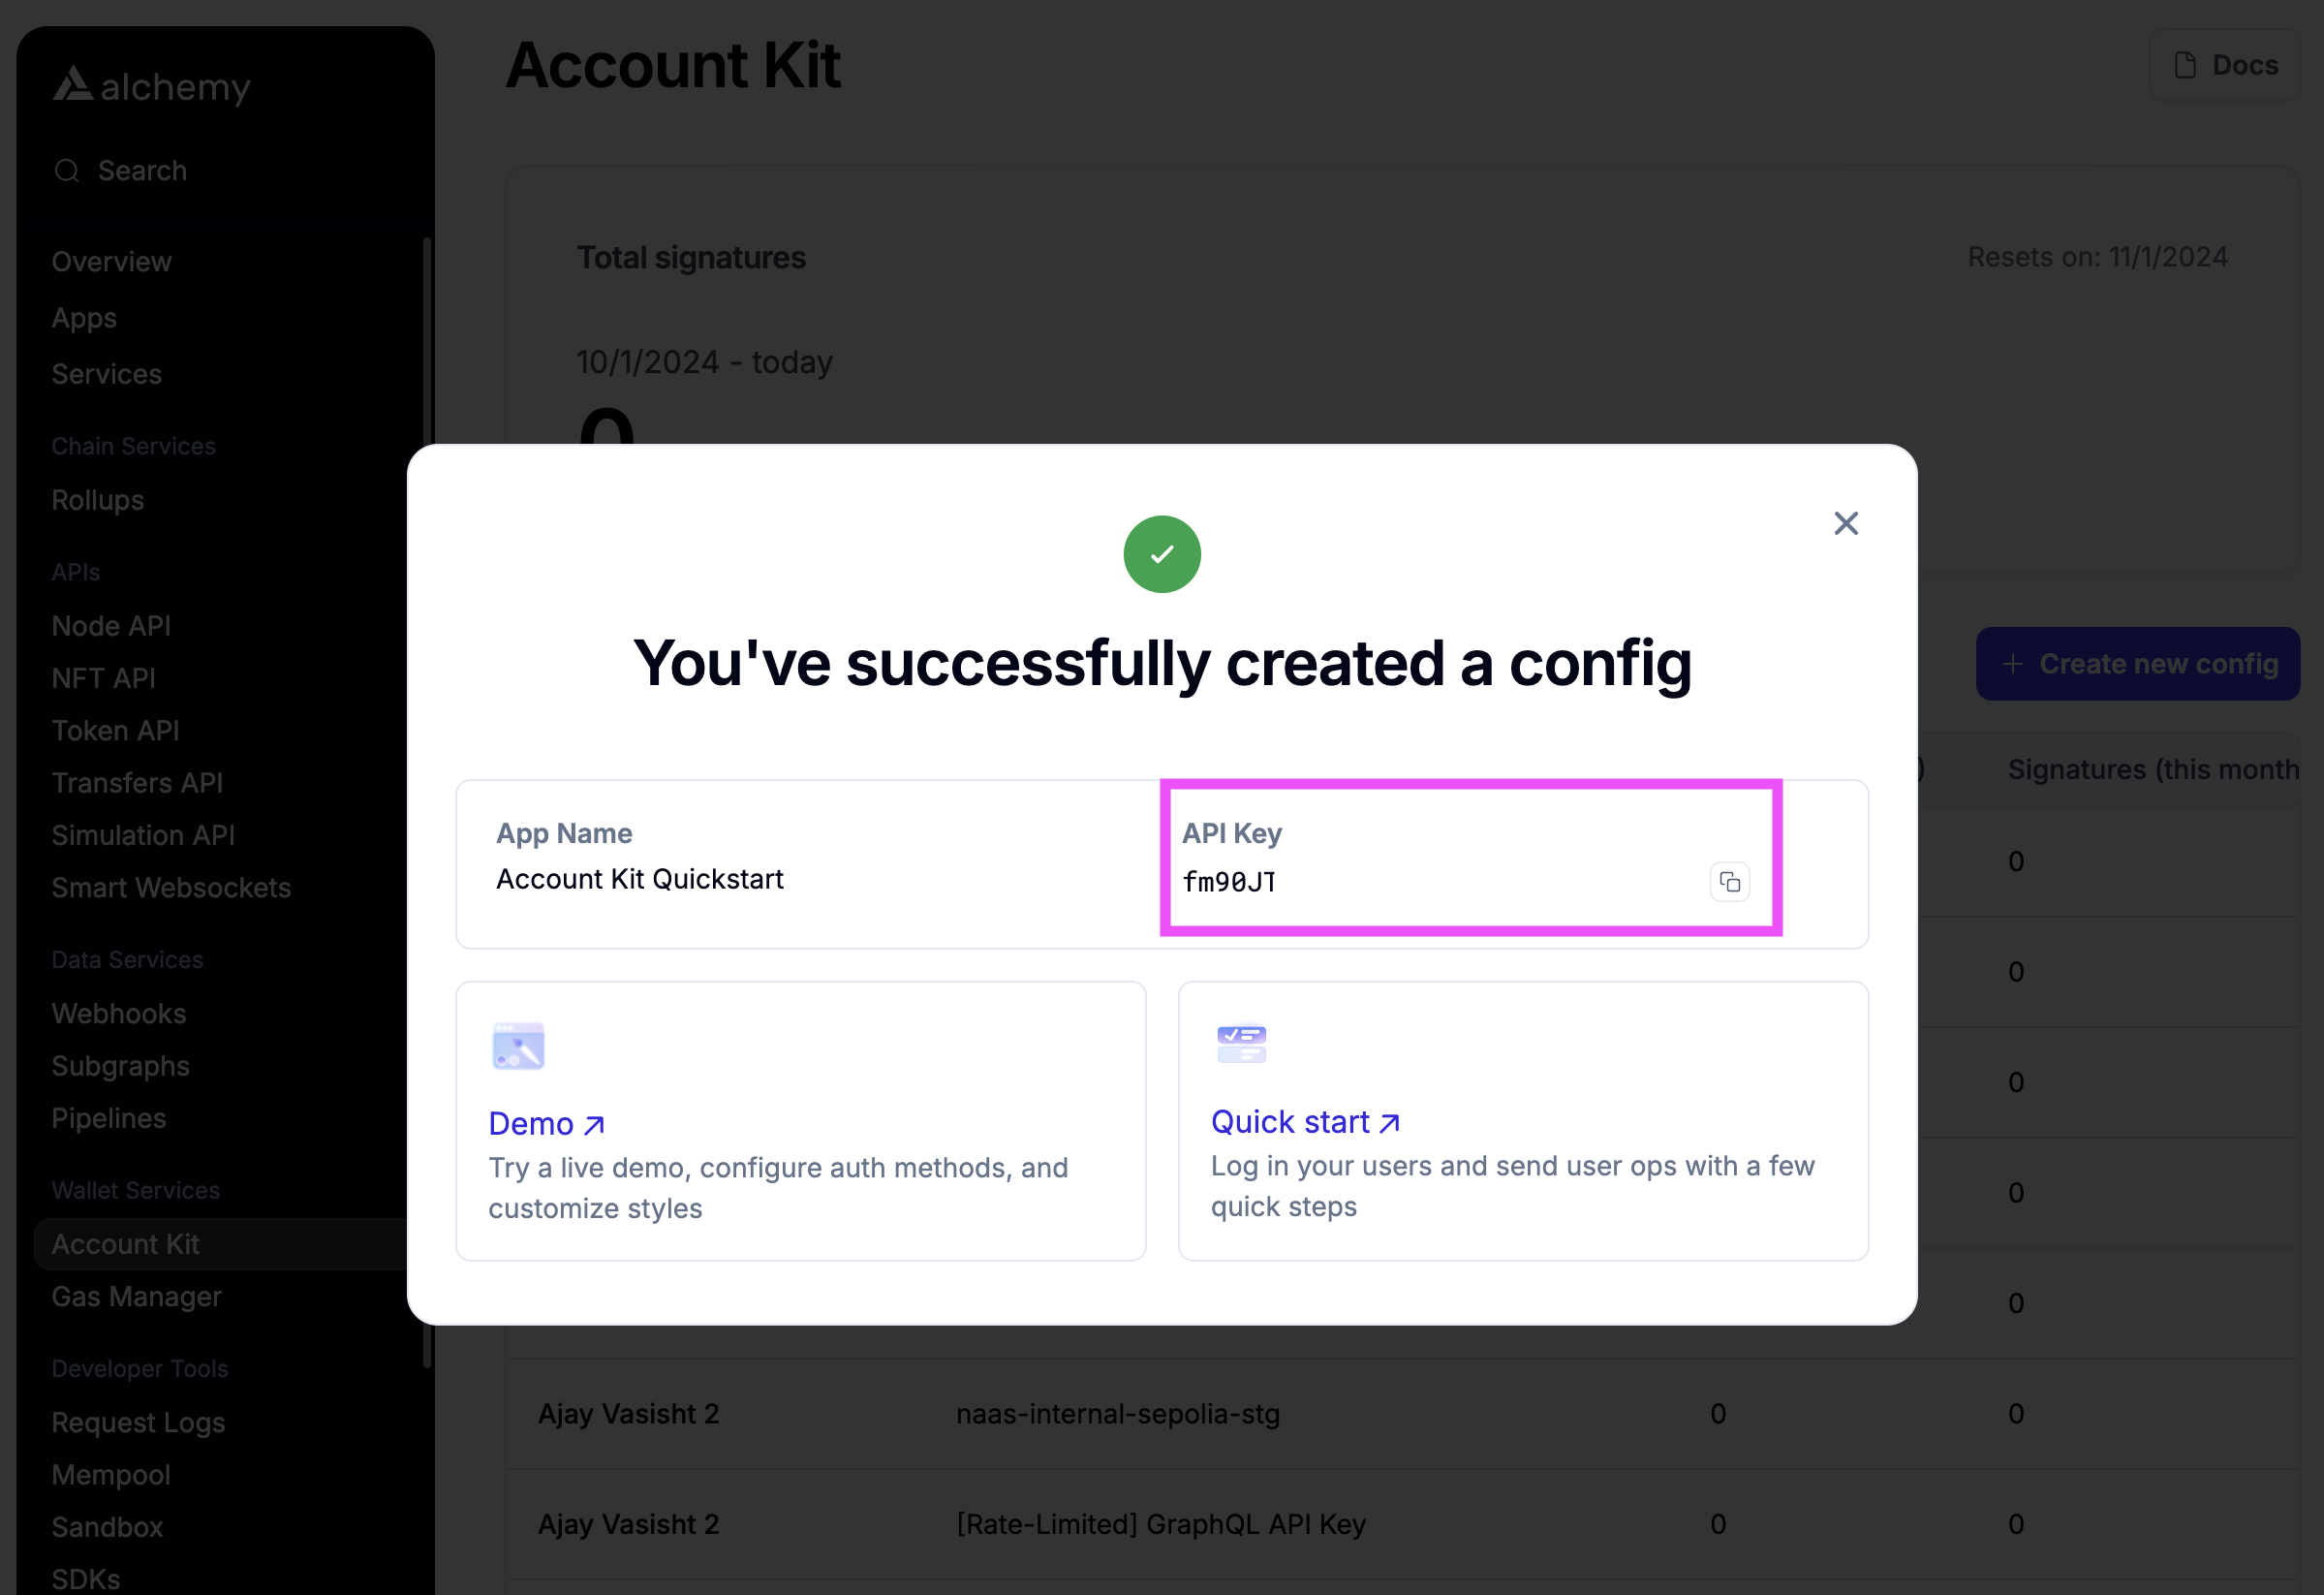
…and paste the API key into config.ts where you see ALCHEMY_API_KEY in the alchemy transport
// ...other stuff in the file
export const config = createConfig(
{
transport: alchemy({ apiKey: "ALCHEMY_API_KEY" }), // TODO: add your Alchemy API key - https://dashboard.alchemy.com/accounts
chain: sepolia,
ssr: true, // more about ssr: https://accountkit.alchemy.com/react/ssr
storage: cookieStorage, // more about persisting state with cookies: https://accountkit.alchemy.com/react/ssr#persisting-the-account-state
enablePopupOauth: true, // must be set to "true" if you plan on using popup rather than redirect in the social login flow
},
uiConfig
);
// ...other stuff in the file3. Run the app!
That's it! Run the NextJS app to see your new auth flow in action ✨
yarn devExisting project
To integrate in to your existing dapp and better understand the above demo app, we will walk through the each of the steps required for using alchemy ui components in technical depth!
1. Install the packages
Prerequisites- minimum React version of 18
- minimum Typescript version of 5
- pin viem to 2.20.0 (
yarn add [email protected]) - pin wagmi to 2.12.7 (
yarn add [email protected])
Install the React and Infra packages from Account Kit along with tailwind for styling and react-query to support react components.
yarn add @account-kit/infra @account-kit/react @tanstack/react-query
yarn add -D tailwindcss @tailwindcss/postcss postcssIf you don't have tailwind setup yet, create a postcss.config.mjs file (if you don't already have one) and add the @tailwindcss/postcss plugin.
export default {
plugins: {
"@tailwindcss/postcss": {},
},
};The only thing left to do is to create a global.css file and import it in the root of your app.
@import "tailwindcss";For more on tailwind setup, see these steps.
2. Get your Alchemy API Key
See the steps above in the NextJS section to get your API key.
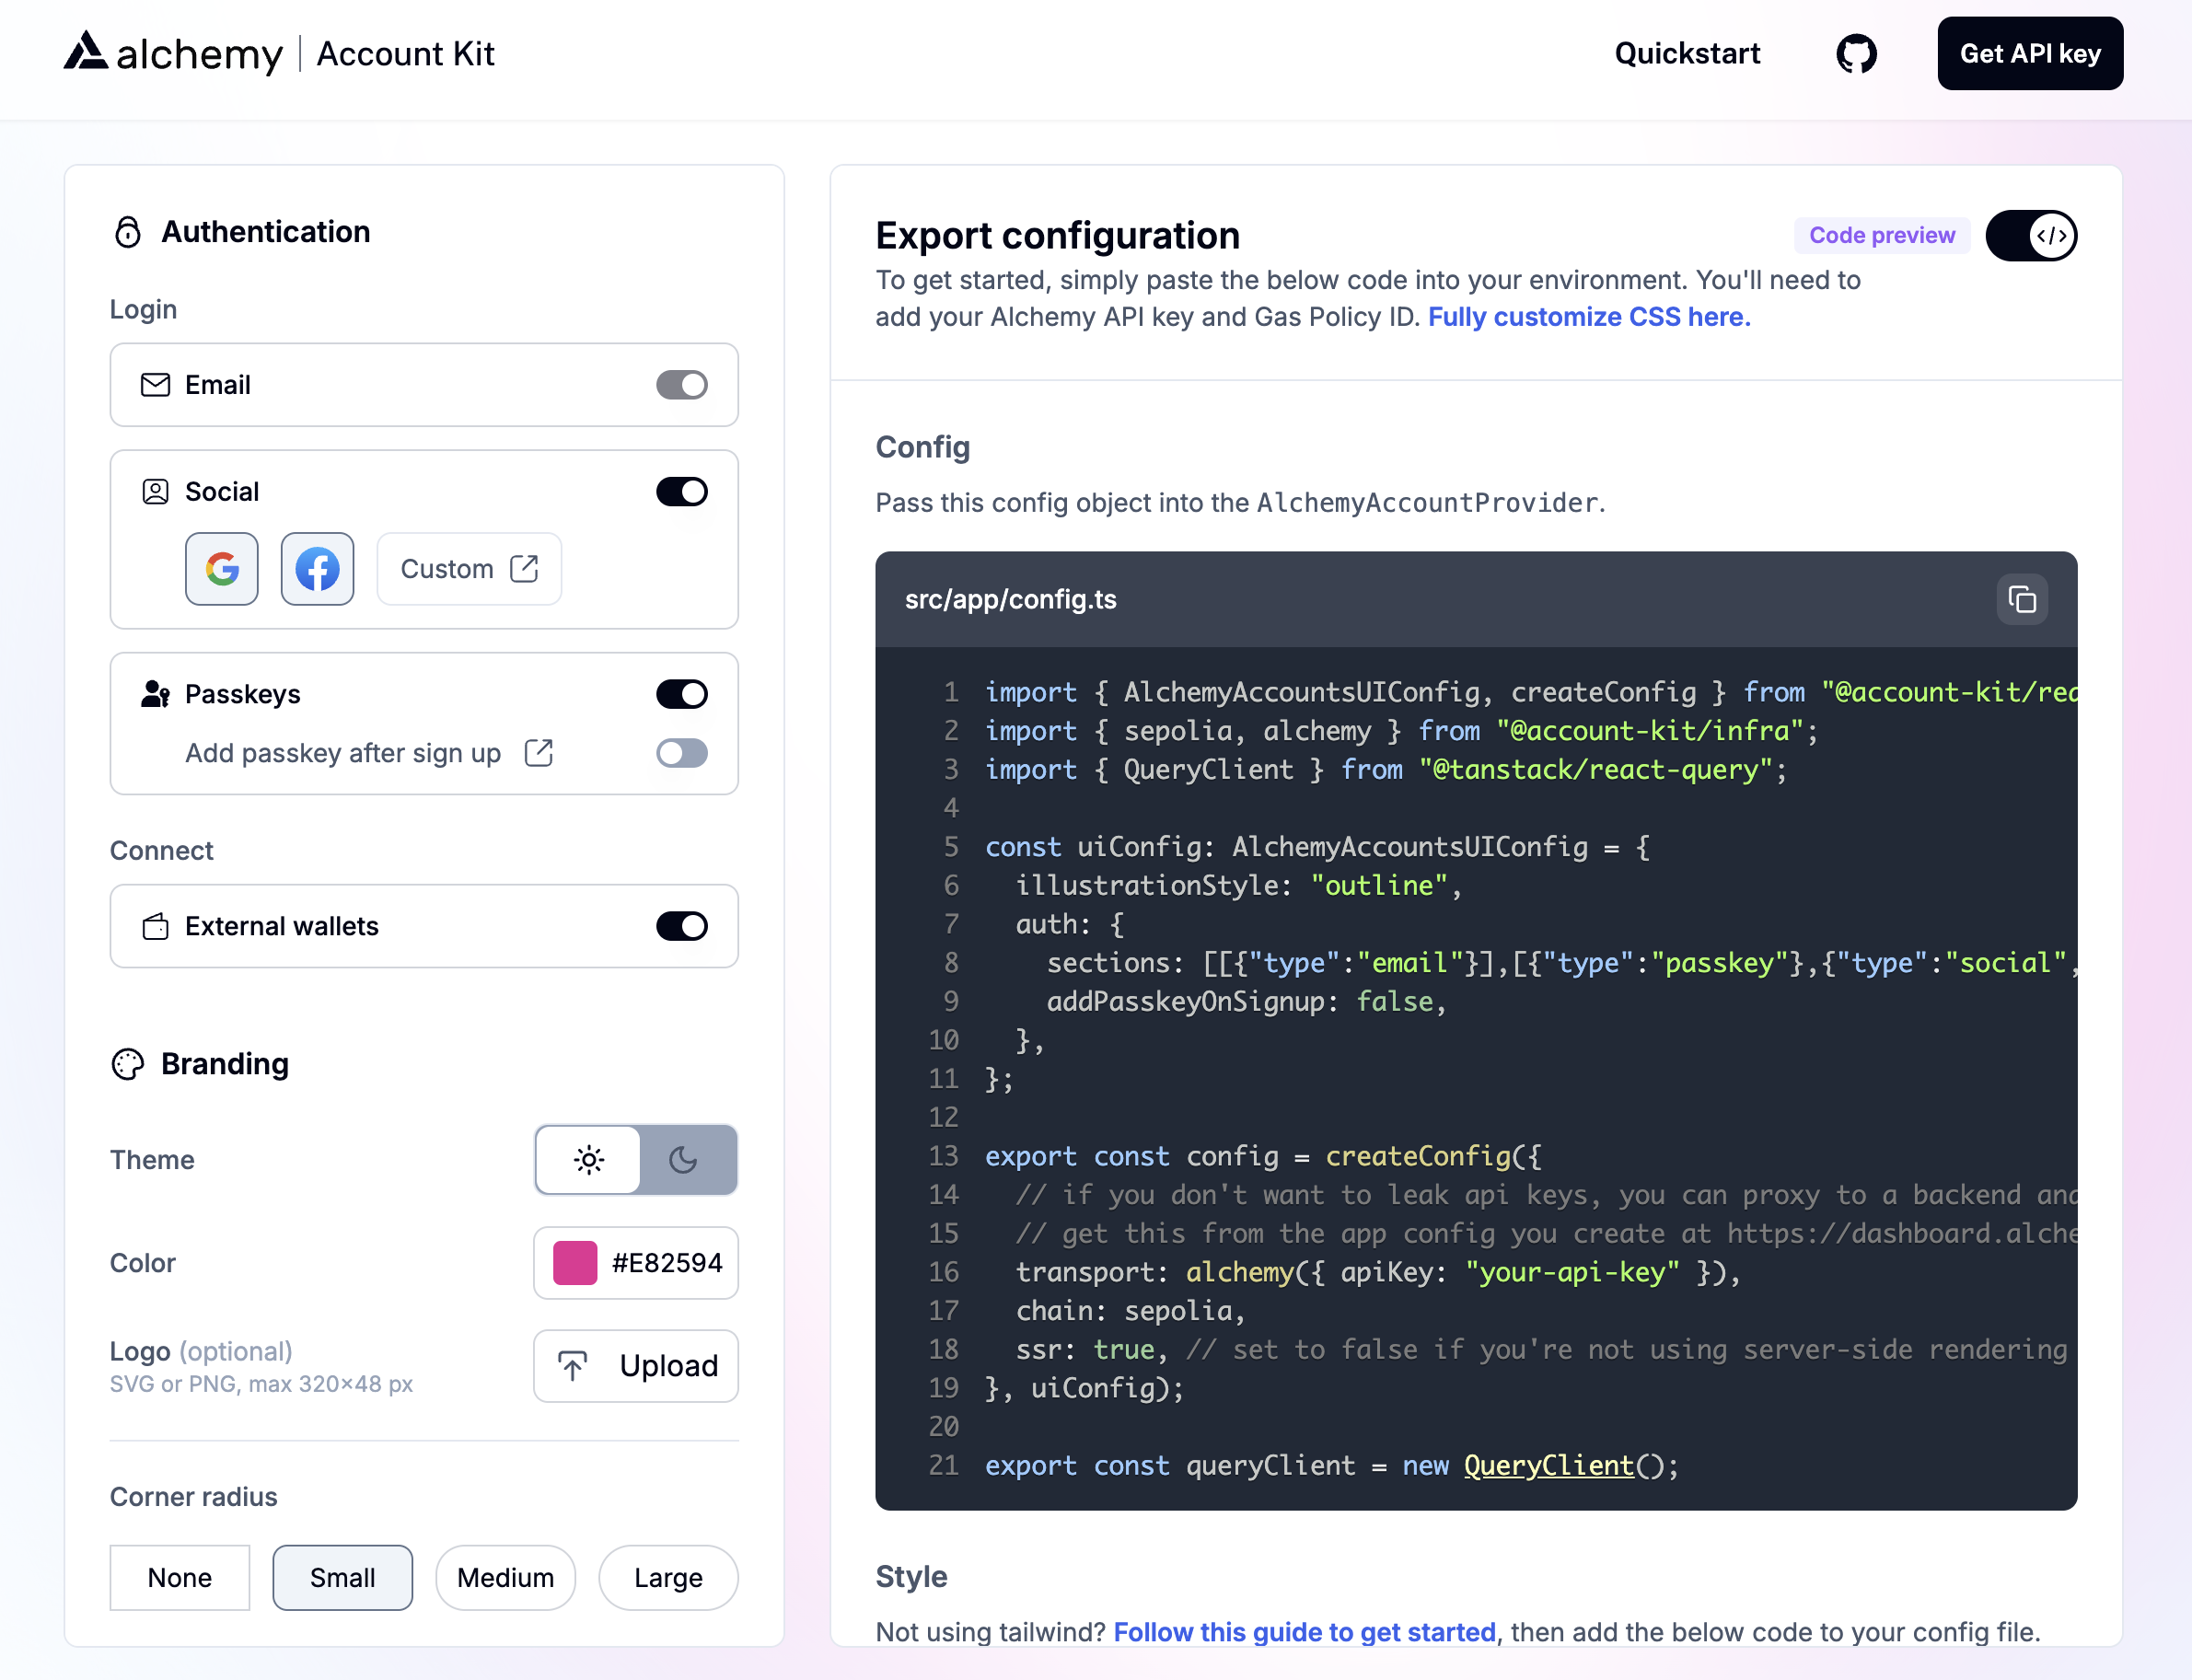
3. Configure your UI components
In this step, you'll customize your authentication methods and UI styles.
The demo app provides an interactive sandbox to explore combinations. When you’re all done, click the ‘Code preview’ toggle to export your code! You’ll get two files:
tailwind.config.tsconfig.ts
*Note: tailwind.config.ts and config.ts changes are required even if using default styling*
3a. Customize styling with tailwind
-
In the demo app, copy your
tailwind.config.tscode into a file of the same name in your project. This will apply your custom styles: colors, border radius, and illustrations.- Logo: logo images are loaded client side for maximum performance, so you’ll need to add the image file to your project and specify the file path in the config where noted.
- Light/Dark mode:
- Light Mode and Dark Mode are set to match the system theme. You can manually override this by following this guide. TLDR: add
@custom-variant dark (&:is(.dark, .dark *));to yourglobal.cssfile.
- Light Mode and Dark Mode are set to match the system theme. You can manually override this by following this guide. TLDR: add
- You can customize even more style properties
-
If your
tailwind.config.tsalready contains any existing config information, be sure to wrap it withwithAccountKitUi:tailwind.config.tsimport { withAccountKitUi } from "@account-kit/react/tailwind"; export default withAccountKitUi( { // 1. (required) your existing tailwind config // If you are using tailwind v4, this will likely be empty. // If you're still using tailwind v3, this will contain things like content, theme, plugins, etc. - https://v3.tailwindcss.com/docs/installation/using-postcss }, { // 2. (optional) overwrite AccountKit theme options } ); -
Update your
global.cssfile to include yourtailwind.config.ts. (Skip this step if you're still using tailwind v3.)
@import "tailwindcss";
@config '../../tailwind.config.ts';3b. Customize authentication methods
-
In the root of your project, create a
config.tsfile -
In the demo app, copy your
config.tscode into the file of the same name in your project. This will apply your authentication methods (email, passkey, etc.)-
createConfigis used to initialize the alchemy provider in the next step. It requires 2 params:-
props: for creating an Alchemy config. Notice the 4 params passed to props in our example:- apiKey (required): Copy-paste your Alchemy API key, from step 2. Note that for production this key should be protected by proxying to the backend and setting rpcUrl instead
- chain (required): Chain imported from @account-kit/infra . This chain must match the chain your api key / embedded accounts config is setup for.
- ssr (optional): Highly recommended for NextJs applications to keep account state consistent between the server and client
- storage (optional): Cookie storage highly recommended for NextJs applications to persist and cache account state across page loads
- enablePopupOauth (optional): If implementing social login, allow for the sign in window to appear as a pop up to your user.
- sessionConfig (optional): Used to configure the session duration
-
ui: for creating Alchemy Accounts UI components -
See here for full details on the ui config params including authentication options
-
-
-
Make sure to export your config and queryClient:
import { createConfig, cookieStorage } from "@account-kit/react";
import { QueryClient } from "@tanstack/react-query";
import { sepolia } from "@account-kit/infra";
export const config = createConfig(
{
// alchemy config
transport: alchemy({ apiKey: "your_api_key" }), // TODO: add your Alchemy API key - setup your app and embedded account config in the alchemy dashboard (https://dashboard.alchemy.com/accounts)
chain: sepolia, // TODO: specify your preferred chain here and update imports from @account-kit/infra
ssr: true, // Defers hydration of the account state to the client after the initial mount solving any inconsistencies between server and client state (read more here: https://accountkit.alchemy.com/react/ssr)
storage: cookieStorage, // persist the account state using cookies (read more here: https://accountkit.alchemy.com/react/ssr#persisting-the-account-state)
enablePopupOauth: true, // must be set to "true" if you plan on using popup rather than redirect in the social login flow
// optional config to override default session manager config
sessionConfig: {
expirationTimeMs: 1000 * 60 * 60, // 60 minutes (default is 15 min)
},
},
{
// authentication ui config - your customizations here
auth: {
sections: [
[{ type: "email" }],
[
{ type: "passkey" },
{ type: "social", authProviderId: "google", mode: "popup" },
{ type: "social", authProviderId: "facebook", mode: "popup" },
],
[
{
type: "external_wallets",
walletConnect: { projectId: "your-project-id" },
},
],
],
addPasskeyOnSignup: true,
showSignInText: true,
},
}
);
export const queryClient = new QueryClient();4. Set up the Alchemy Provider
This example assumes you are using the NextJS app router.
However, the key pieces are applicable to any React app and you can structure the location of the code as needed.
4a. Create the provider - app/providers.tsx
Once you have styling and authentication configs, create a providers.tsx file and import the AlchemyAccountProvider.
The QueryClientProvider is also required to handle React Queries within the Alchemy Account Provider.
"use client";
import { config, queryClient } from "@/config";
import { AlchemyClientState } from "@account-kit/core";
import { AlchemyAccountProvider } from "@account-kit/react";
import { QueryClientProvider } from "@tanstack/react-query";
import { PropsWithChildren } from "react";
export const Providers = (
props: PropsWithChildren<{ initialState?: AlchemyClientState }>
) => {
return (
<QueryClientProvider client={queryClient}>
<AlchemyAccountProvider
config={config}
queryClient={queryClient}
initialState={props.initialState}
>
{props.children}
</AlchemyAccountProvider>
</QueryClientProvider>
);
};4b. Use the provider - layout.tsx
Any component or page that will use Alchemy React components, must be wrapped by this Provider.
Additionally, we recommend using cookies to set the initial state when creating the provider to persist state across reloads (🧠 remember the cookie storage configured in step 3b).
For example, wrap your app with the created Provider by modifying your layout.tsx file.
import { config } from "@/config";
import { cookieToInitialState } from "@account-kit/core";
import type { Metadata } from "next";
import { Inter } from "next/font/google";
import { headers } from "next/headers";
import "./globals.css";
import { Providers } from "./providers";
const inter = Inter({ subsets: ["latin"] });
export const metadata: Metadata = {
title: "Embedded Accounts UI Components Quickstart NextJs Template",
description: "Embedded Accounts UI Components Quickstart NextJs Template",
};
export default function RootLayout({
children,
}: Readonly<{
children: React.ReactNode;
}>) {
// This will allow us to persist state across page boundaries (read more here: https://accountkit.alchemy.com/react/ssr#persisting-the-account-state)
const initialState = cookieToInitialState(
config,
headers().get("cookie") ?? undefined
);
return (
<html lang="en">
<body className={inter.className}>
<Providers initialState={initialState}>{children}</Providers>
</body>
</html>
);
}5. Run it
Once you have wrapped your app with the Alchemy Provider, you can now use the pre-built Alchemy react components for auth throughout your app.
All you need to do is useAuthModal! For example, pop open the auth modal like so:
"use client";
import {
useAuthModal,
useLogout,
useSignerStatus,
useUser,
} from "@account-kit/react";
export default function Home() {
const user = useUser();
const { openAuthModal } = useAuthModal();
const signerStatus = useSignerStatus();
const { logout } = useLogout();
return (
<main className="flex min-h-screen flex-col items-center p-24 gap-4 justify-center text-center">
{signerStatus.isInitializing ? (
<>Loading...</>
) : user ? (
<div className="flex flex-col gap-2 p-2">
<p className="text-xl font-bold">Success!</p>
You're logged in as {user.email ?? "anon"}.<button
className="akui-btn akui-btn-primary mt-6"
onClick={() => logout()}
>
Log out
</button>
</div>
) : (
<button className="akui-btn akui-btn-primary" onClick={openAuthModal}>
Login
</button>
)}
</main>
);
}