

Getting started with authentication
Account Kit makes it really easy to authenticate your users using a number of different authentication methods. If you followed the quickstart, then your app is already setup to authenticate users and you can skip this guide!
Implementation Options
For each authentication method, you have two implementation options:
-
Pre-built UI Components - Ready-to-use components that handle the entire authentication flow with minimal code and customizable styling.
-
Custom UI with React Hooks - Build your own UI components using our React hooks for complete control over the user experience.
Authentication Methods
Account Kit supports several authentication methods:
- Email OTP - One-time password sent via email
- Email Magic Link - Authentication links sent via email
- Social Login - Authentication with providers like Google and Facebook
- Custom Social Providers - Add custom OAuth providers via Auth0
- Passkey Signup - Create accounts with passkeys
- Passkey Login - Authenticate with existing passkeys
- Multi-Factor Authentication - Add an additional verification layer after initial login using an authenticator app
Setup
If you haven't followed the quickstart guide, make sure to set up the following first:
-
Get your API key by creating a new app in your Alchemy Dashboard
-
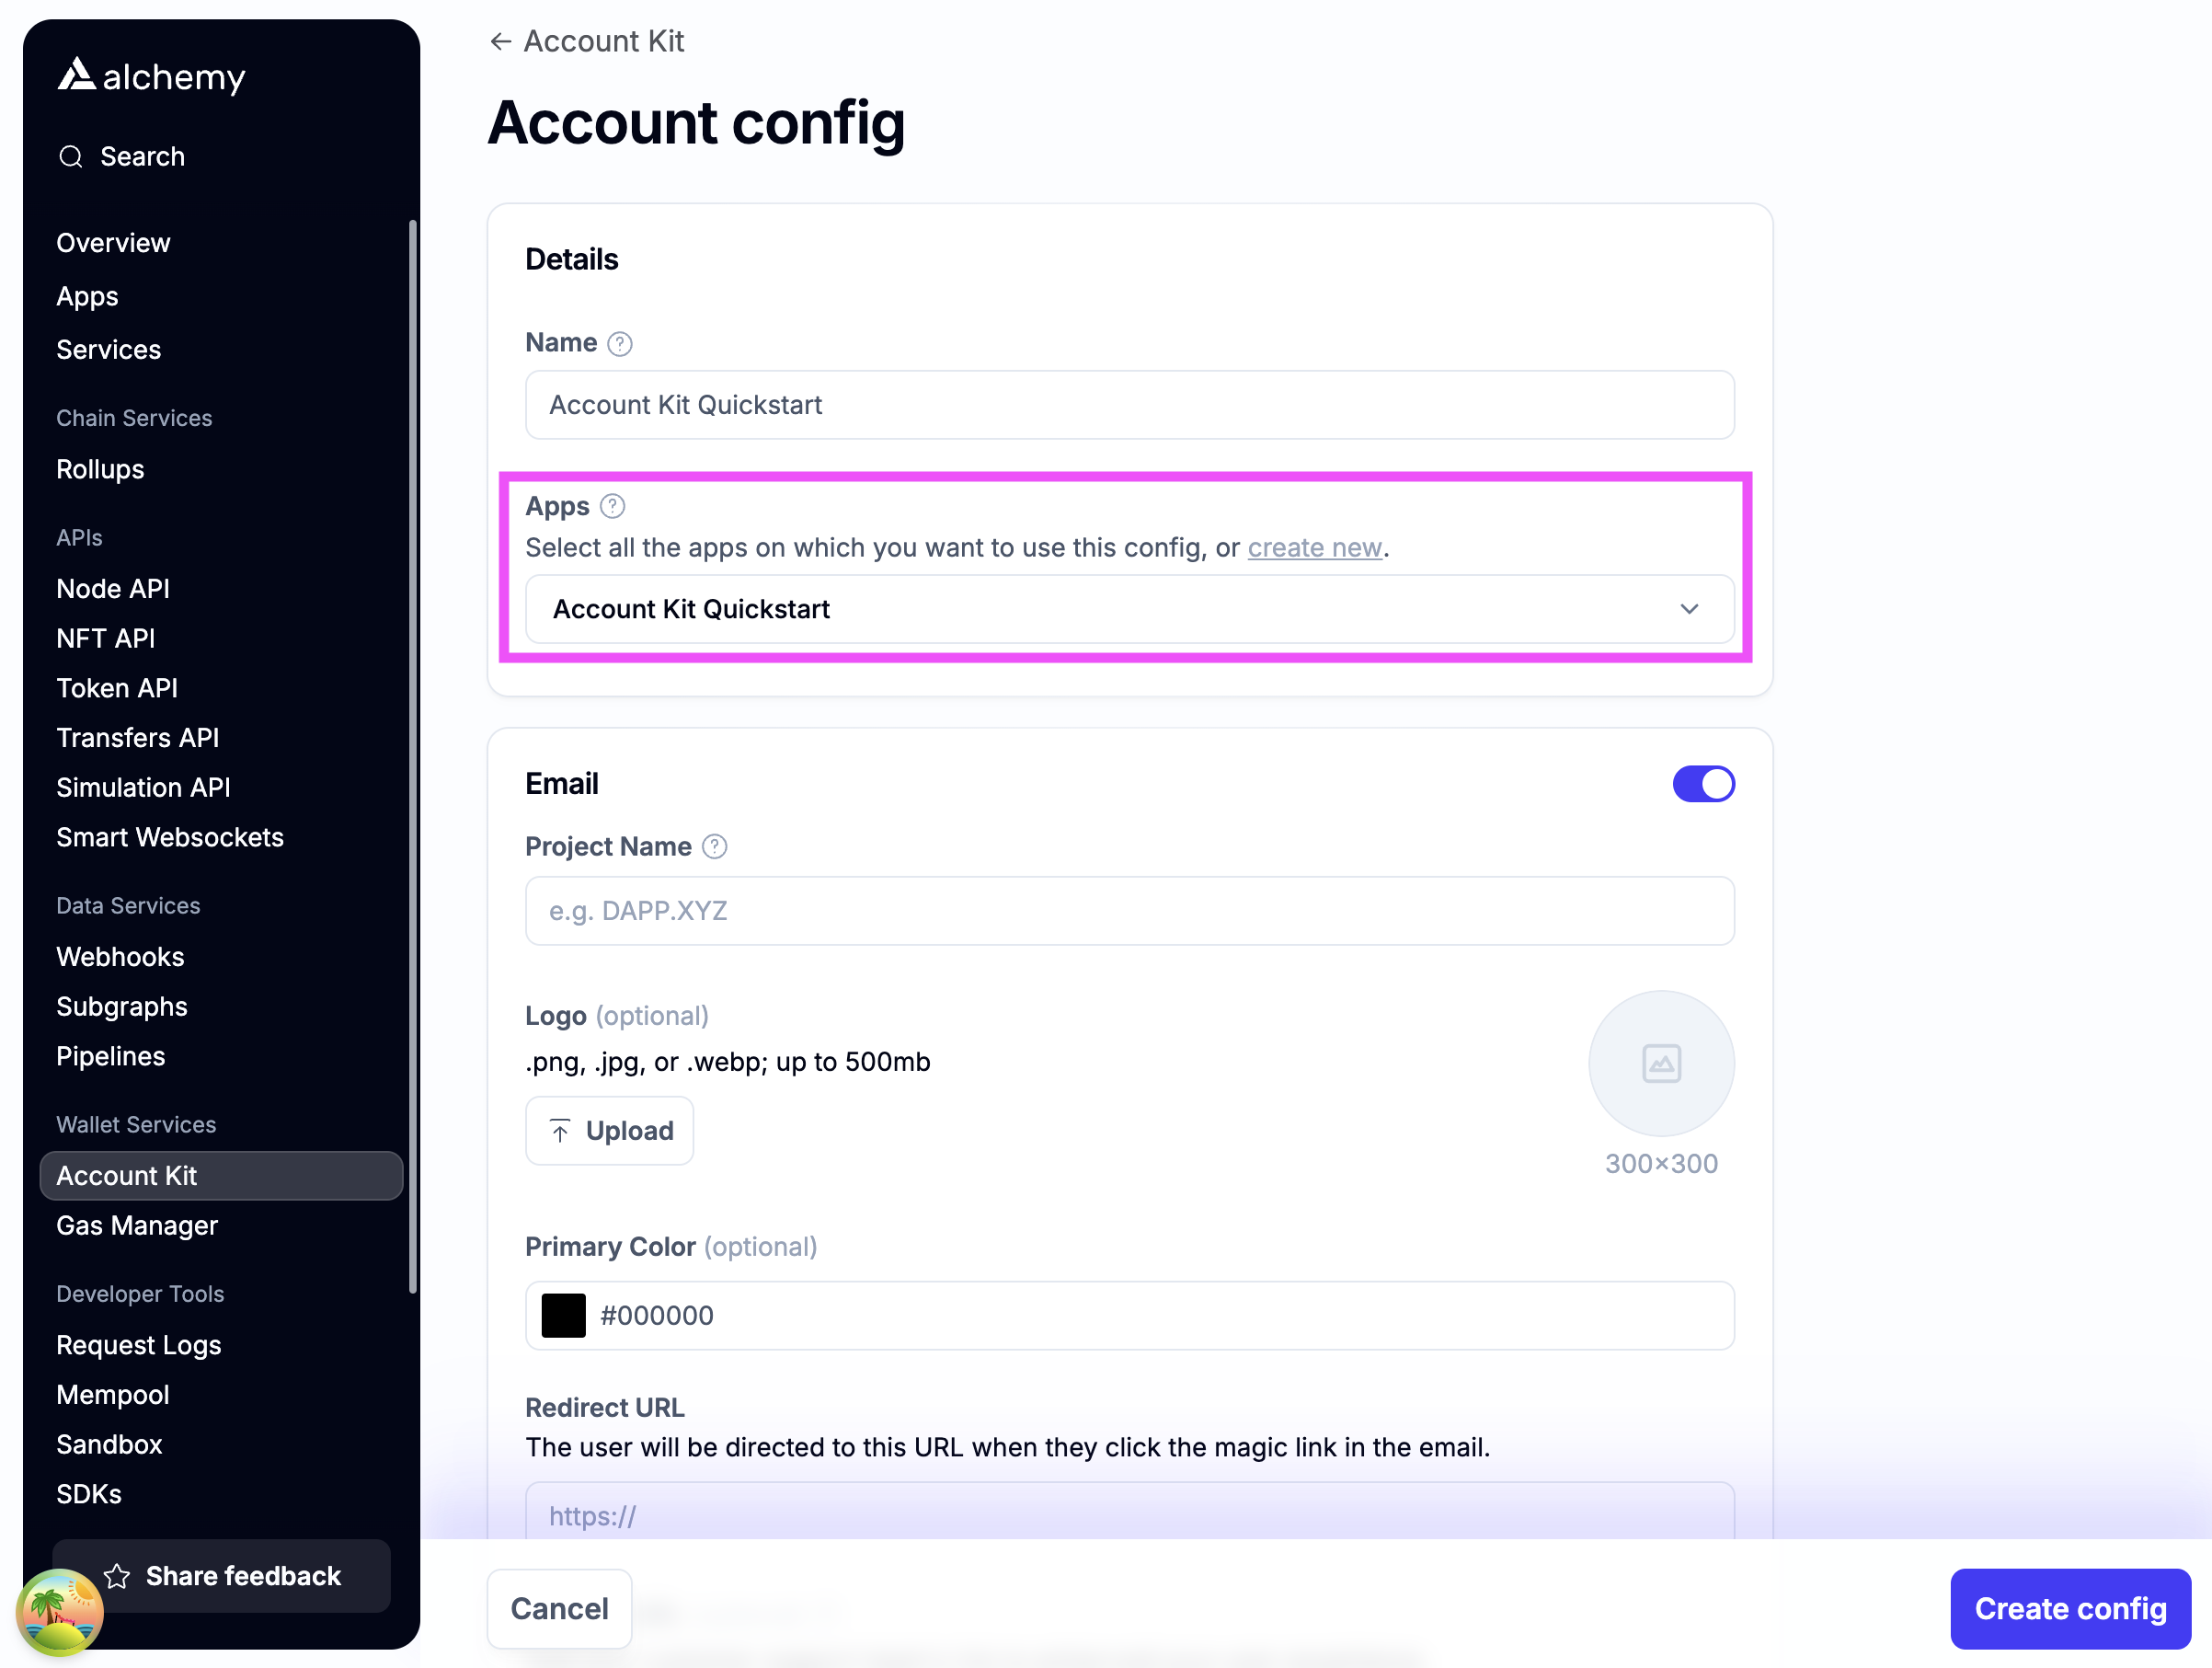
Create a new account config in your Account Kit Dashboard
-
Apply the config to your app from step 1
-
Enable authentication methods you want to support.
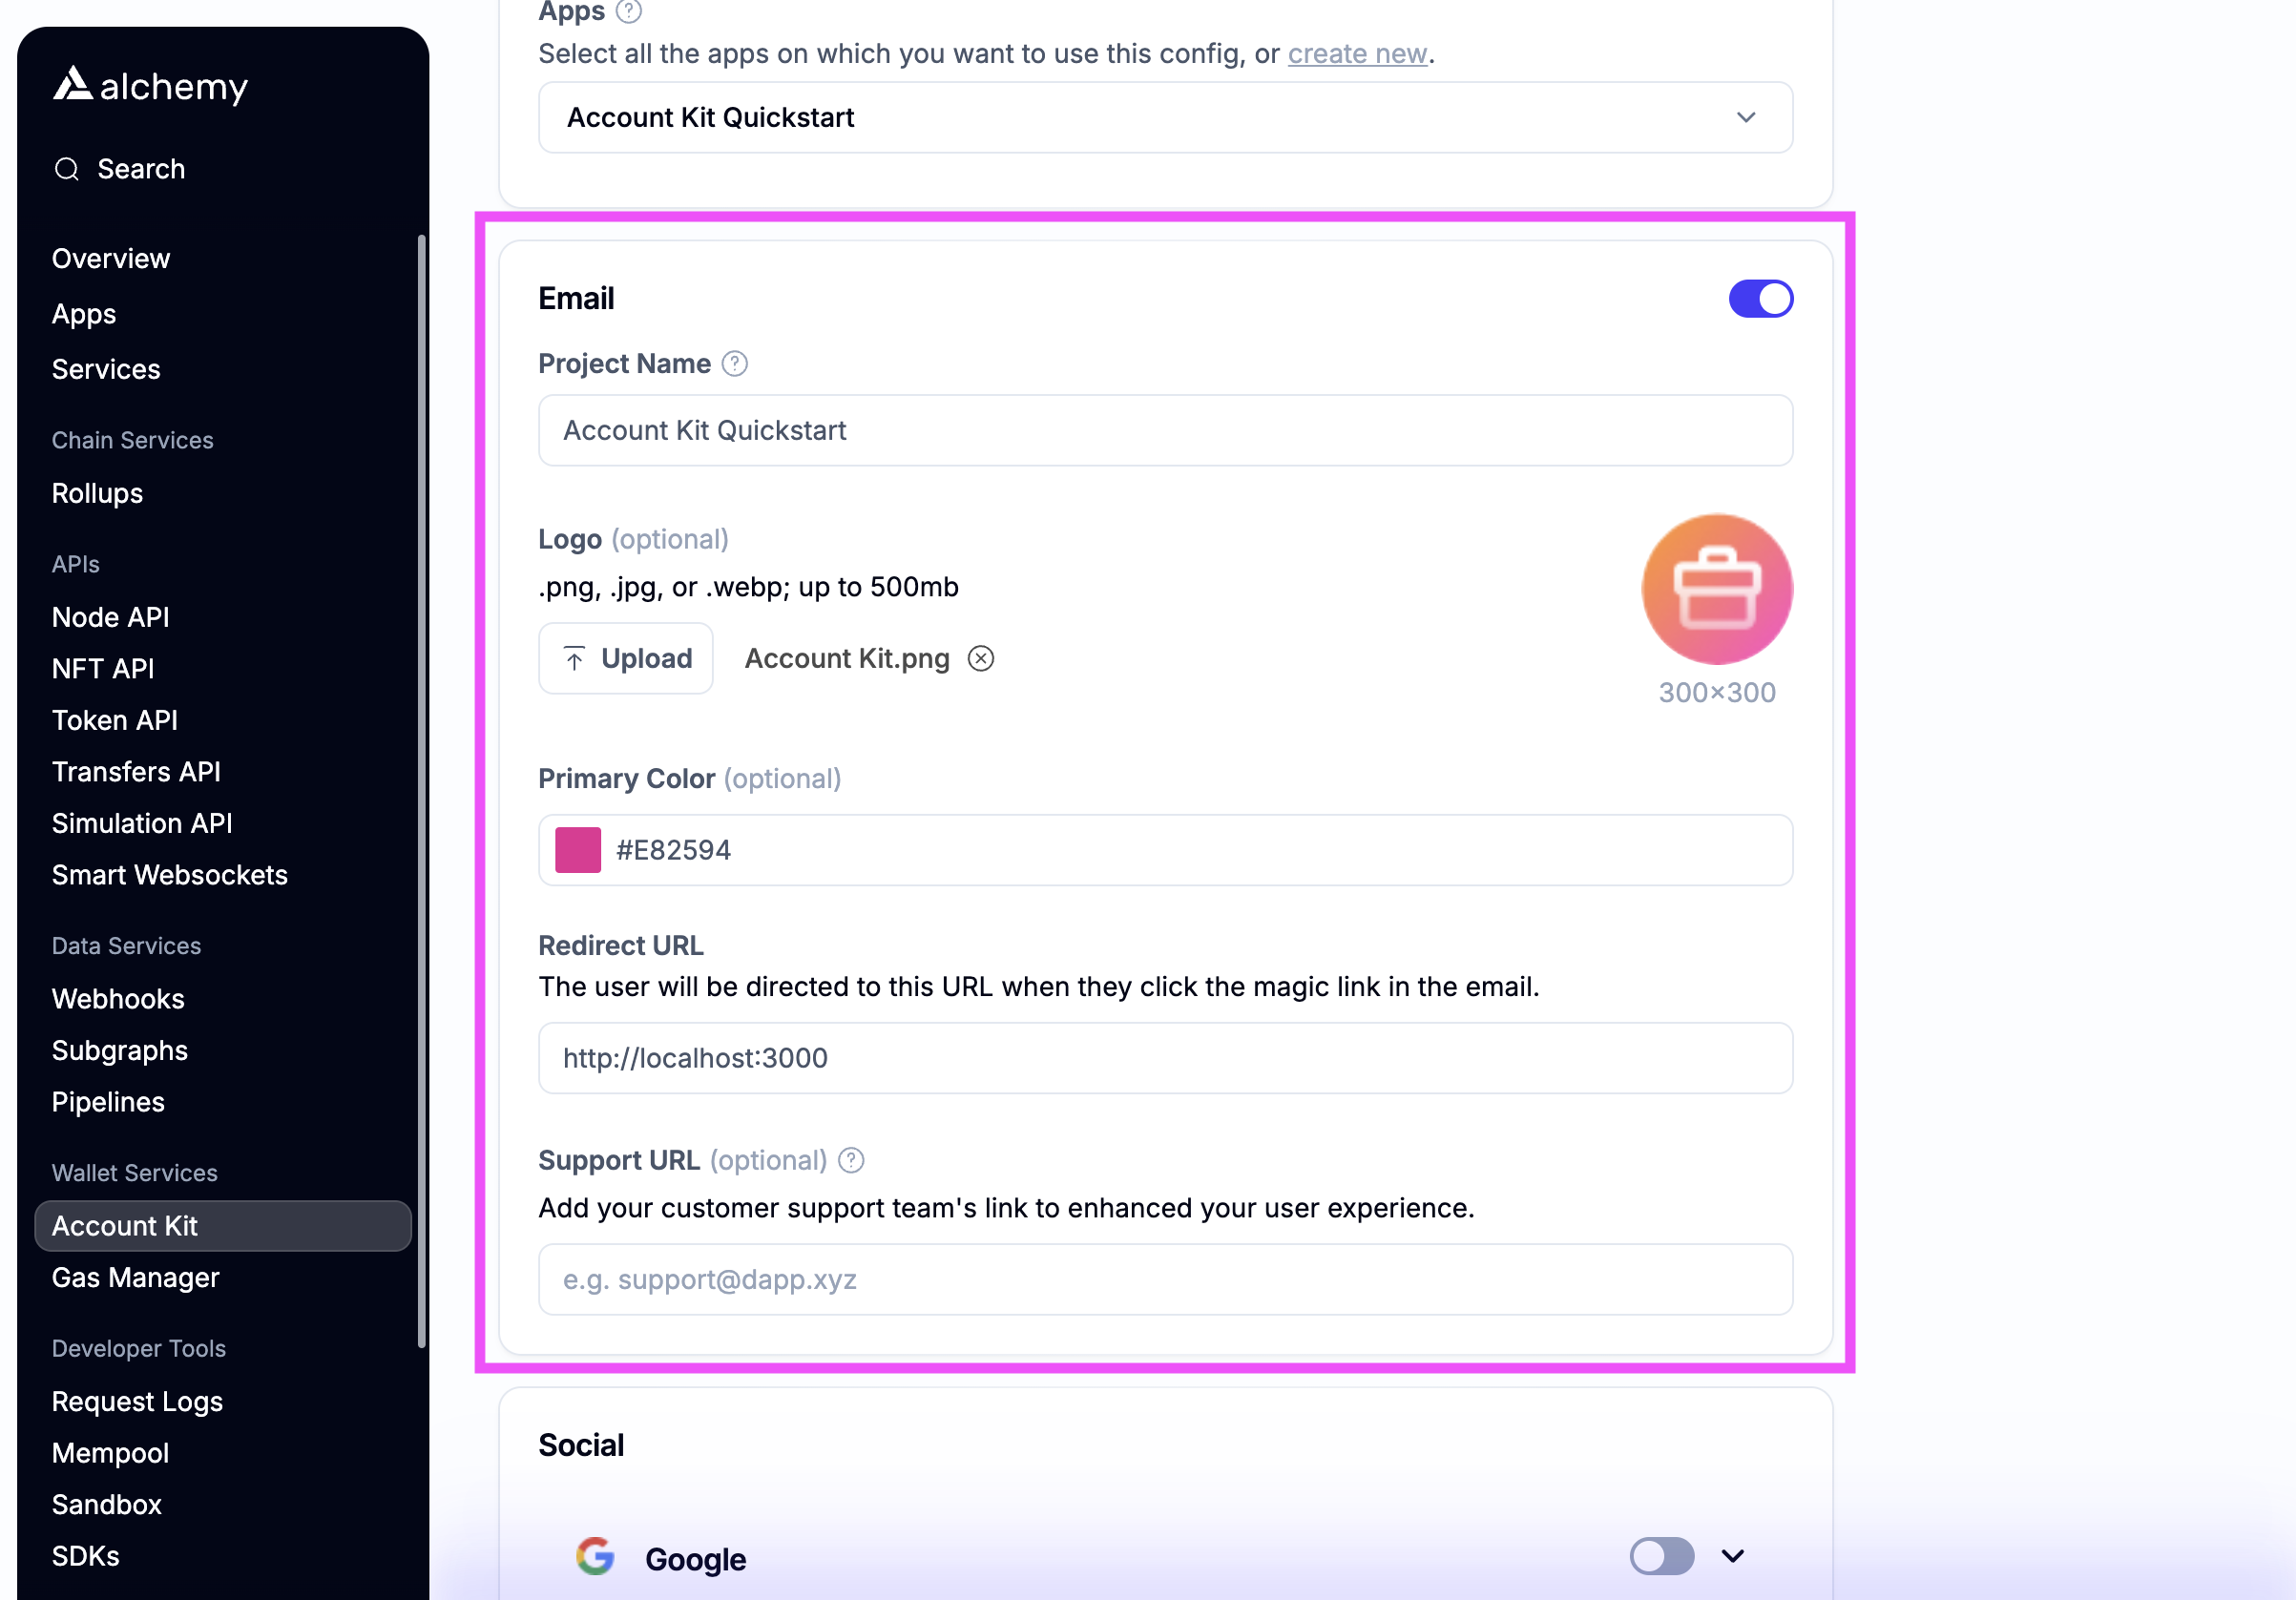
Email authIf you want to use email auth, toggle on email.
- For testing, use http://localhost:3000 as the Redirect URL (Note http not https)
- The user will be redirected to the Redirect URL if you use the magic link email flow
- Optionally stylize ✨ the email with your brand color and logo!
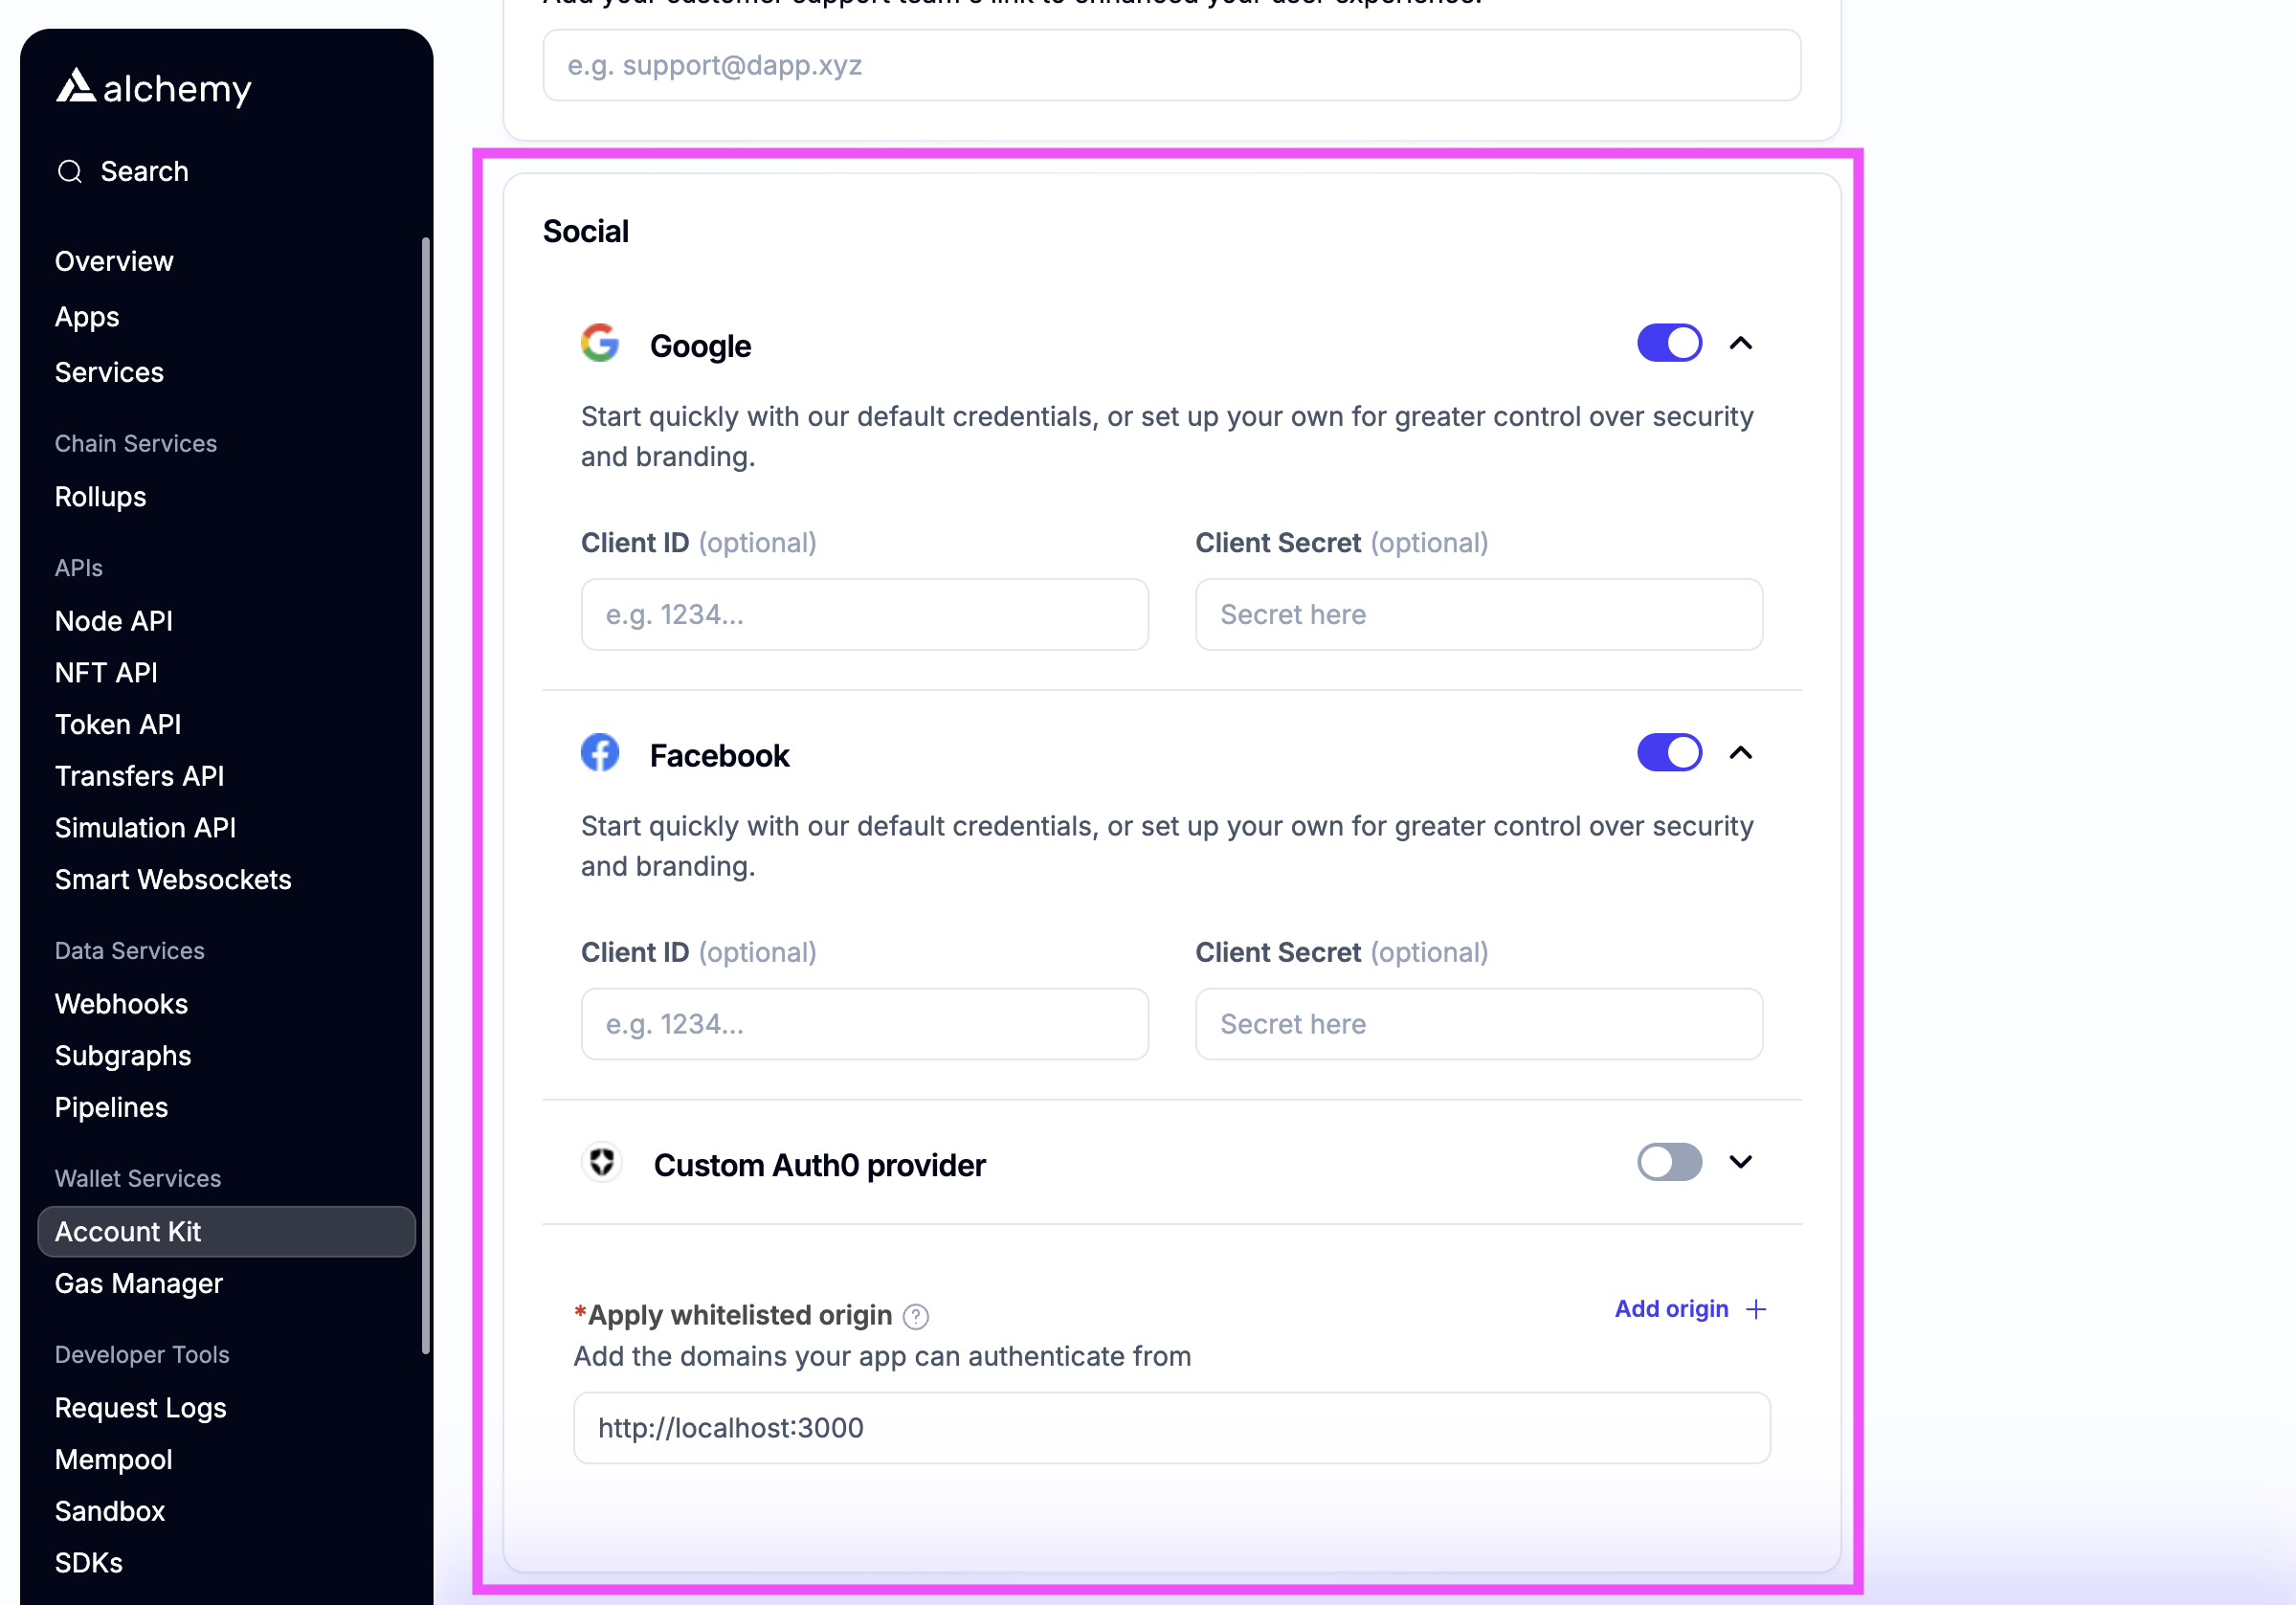
Social authIf you want to enable social login, toggle which auth providers you want to support.
-
For testing, add http://localhost:3000 as a whitelisted origin
-
Add the link that your dapp will be running on to the whitelisted origin list
-
Optionally enter your own OAuth credentials or use our defaults
-
-
Create the config and copy the API Key
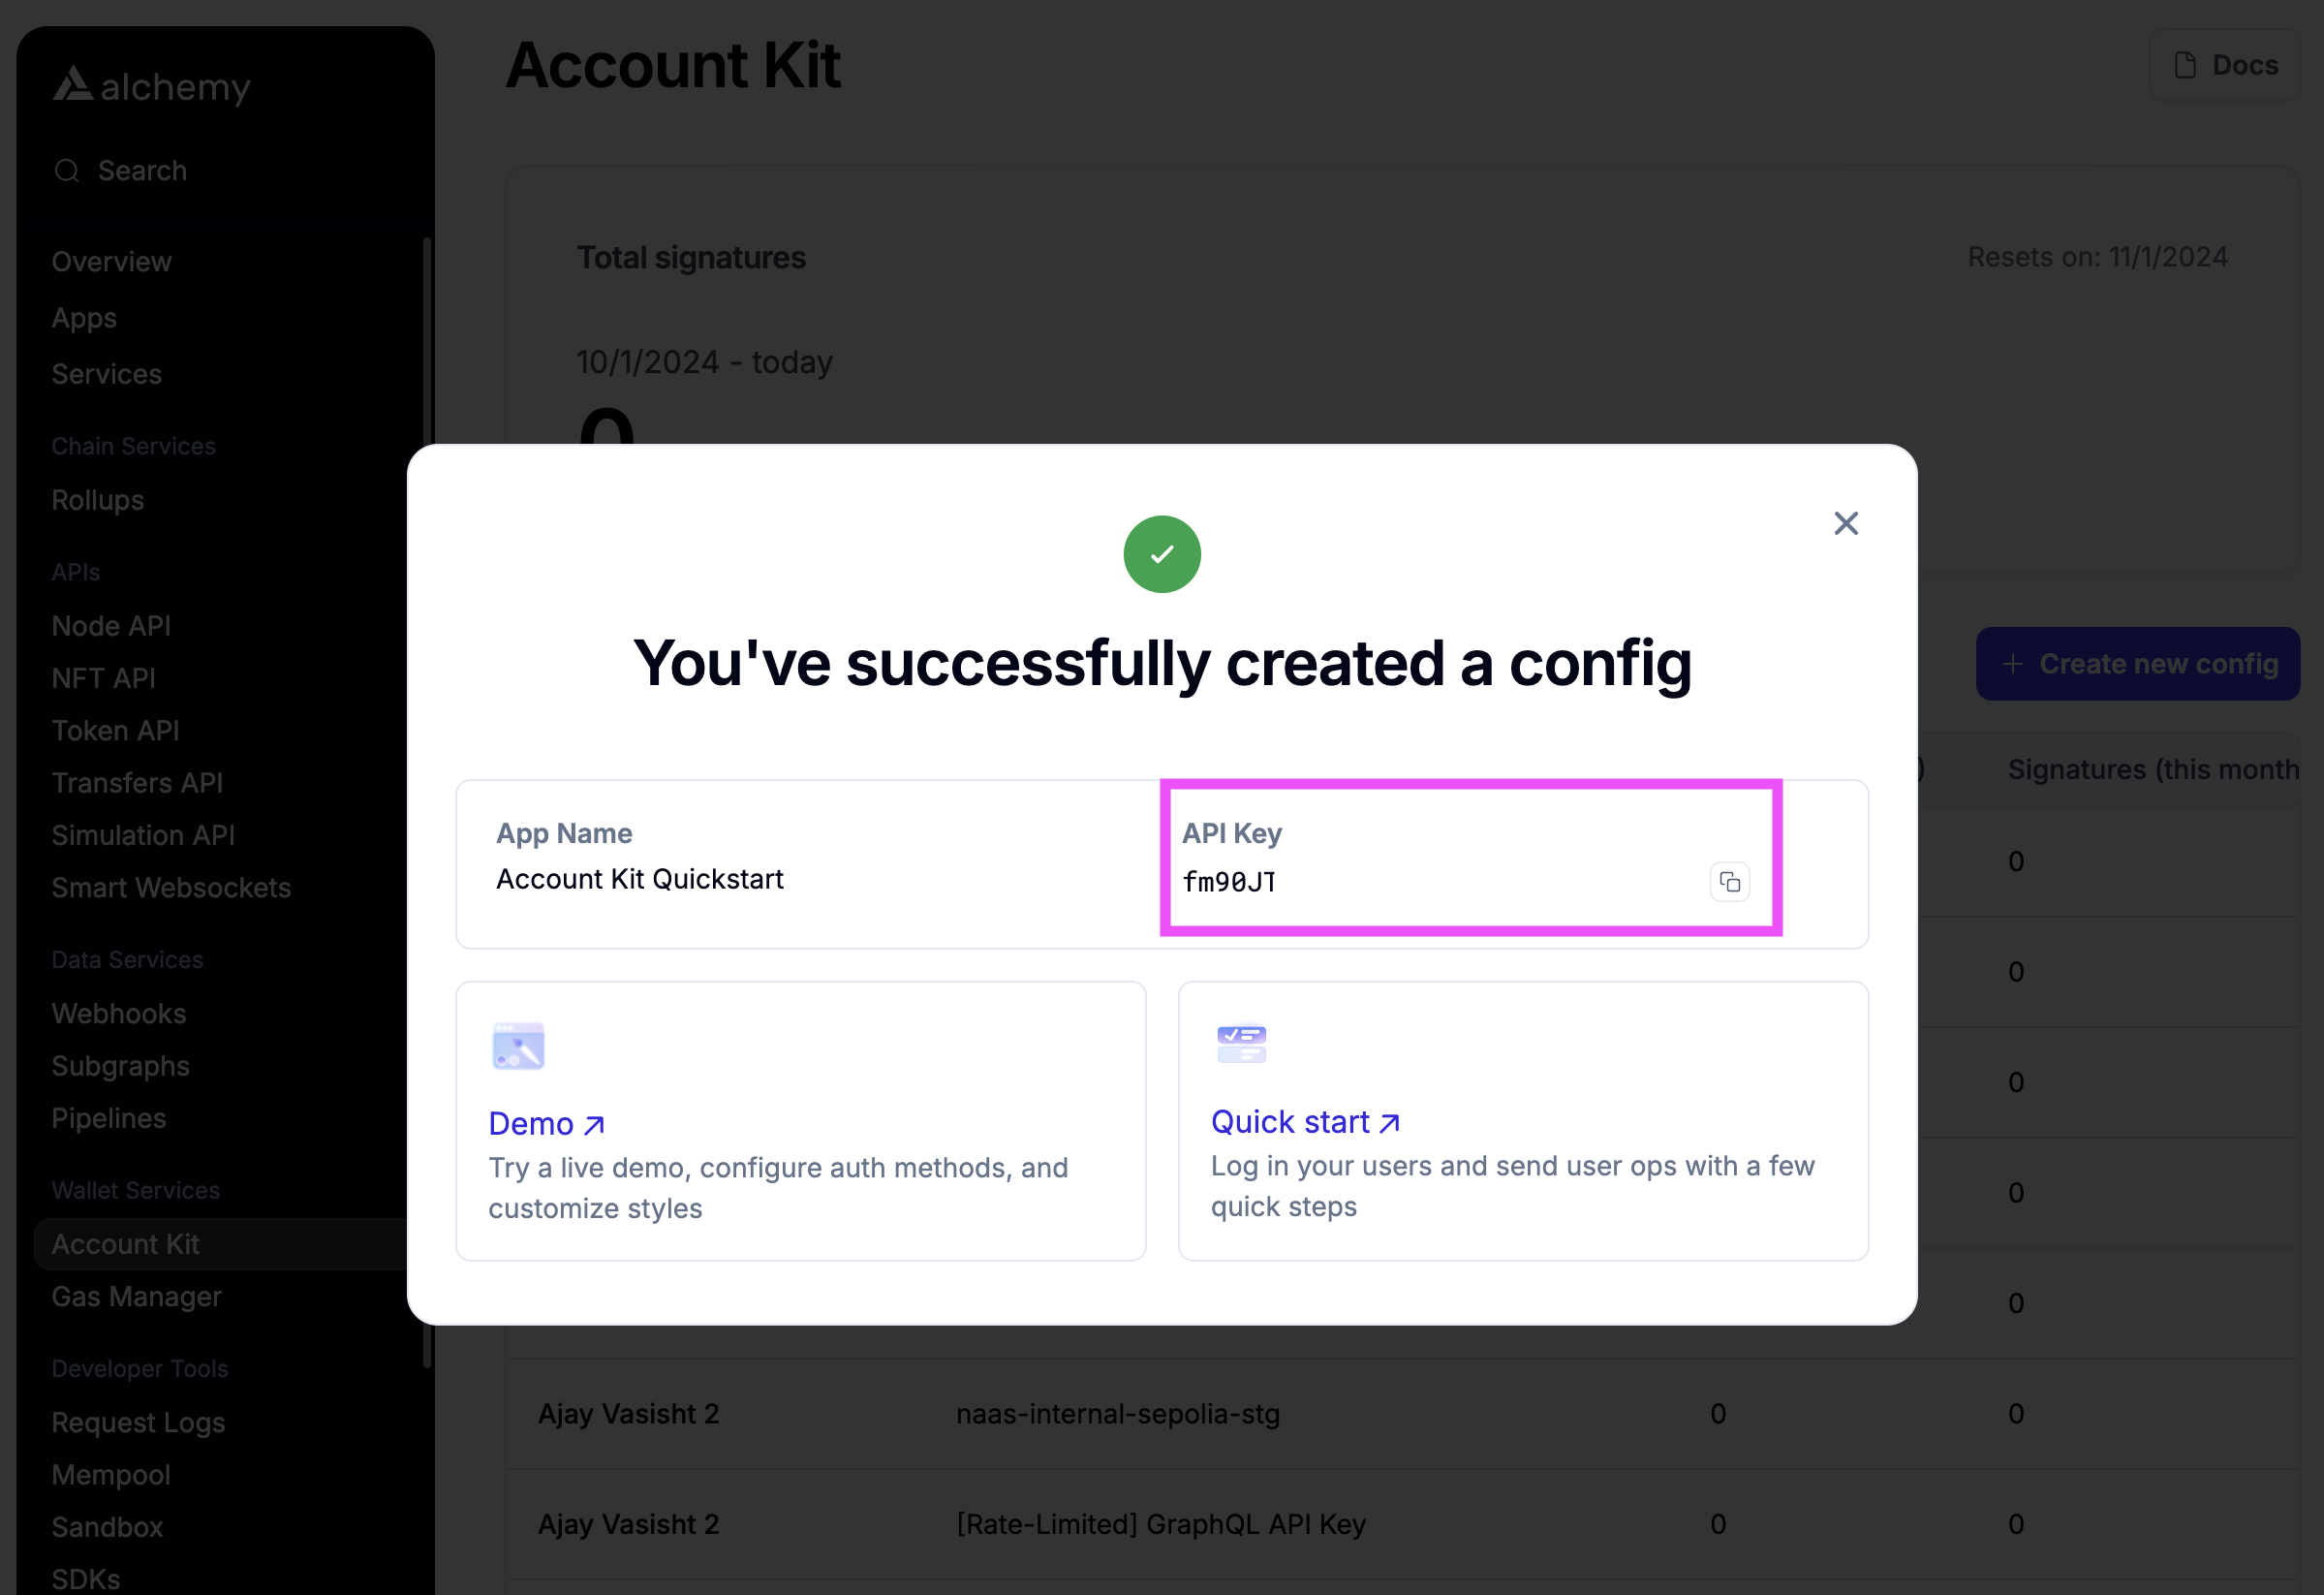
...and paste the API key into your app's config.ts
import { AlchemyAccountsUIConfig, createConfig } from "@account-kit/react";
import { sepolia, alchemy } from "@account-kit/infra";
// Define UI configuration for authentication components
// See individual login method pages for detailed configuration options
const uiConfig: AlchemyAccountsUIConfig = {
auth: {
sections: [
[
// Example: Email OTP authentication
{
type: "email",
emailMode: "otp",
},
// You can add more authentication methods here
// See login method pages for available options
],
],
},
};
export const config = createConfig(
{
transport: alchemy({ apiKey: "ALCHEMY_API_KEY" }), // TODO: add your Alchemy API key - https://dashboard.alchemy.com/accounts
chain: sepolia,
ssr: true, // more about ssr: https://accountkit.alchemy.com/react/ssr
enablePopupOauth: true, // must be set to "true" if you plan on using popup rather than redirect in the social login flow
// For more about persisting state with cookies, see: https://accountkit.alchemy.com/react/ssr#persisting-the-account-state
// storage: cookieStorage,
},
uiConfig
);What's next?
Now you can choose which authentication methods you want to implement and how you want to implement them:
- Using our Pre-built UI components to handle the entire authentication flow with minimal code.
- Using our React hooks to build your own custom UI for complete control.
Each authentication method has dedicated documentation for both implementation approaches.
Enhancing Security with Multi-Factor Authentication
After implementing your chosen authentication methods, you can add an extra layer of security by enabling multi-factor authentication (MFA):
You can enable multi-factor authentication (MFA) via authenticator apps (TOTP). These generate time-based one-time passcodes in an app like Google Authenticator or Authy. When users log in via Email OTP, Magic Link, or Social Login, they'll be prompted for their 6-digit TOTP code if MFA is enabled.
Multi-factor authentication significantly improves account security by requiring users to verify their identity using both their primary authentication method and a time-based code from an authenticator app.