

Setup your application
This section will walk you through the steps to create your application, install the necessary dependencies, and write the boilerplate code you'll need to integrate Embedded Accounts!
Create your app
First, create a NextJS React application by running npx create-next-app from your terminal in a project directory of your choice. Select the default configuration for each question the create-next-app CLI.
Also, at the root of this new application directory, add a .env file.
Configure the Embedded Accounts
First, create an Alchemy API key, an Embedded Accounts Config, and a Gas Manager Policy. You will use these to send UOs, authenticate logins, and sponsor gas respectively.
Alchemy API Key
The Alchemy API Key will allow you to read and write to blockchains through Alchemy's reliable infrastructure. In this context, the API Key will let you create Embedded Accounts onchain for your users, and send UserOperations on behalf of those accounts.
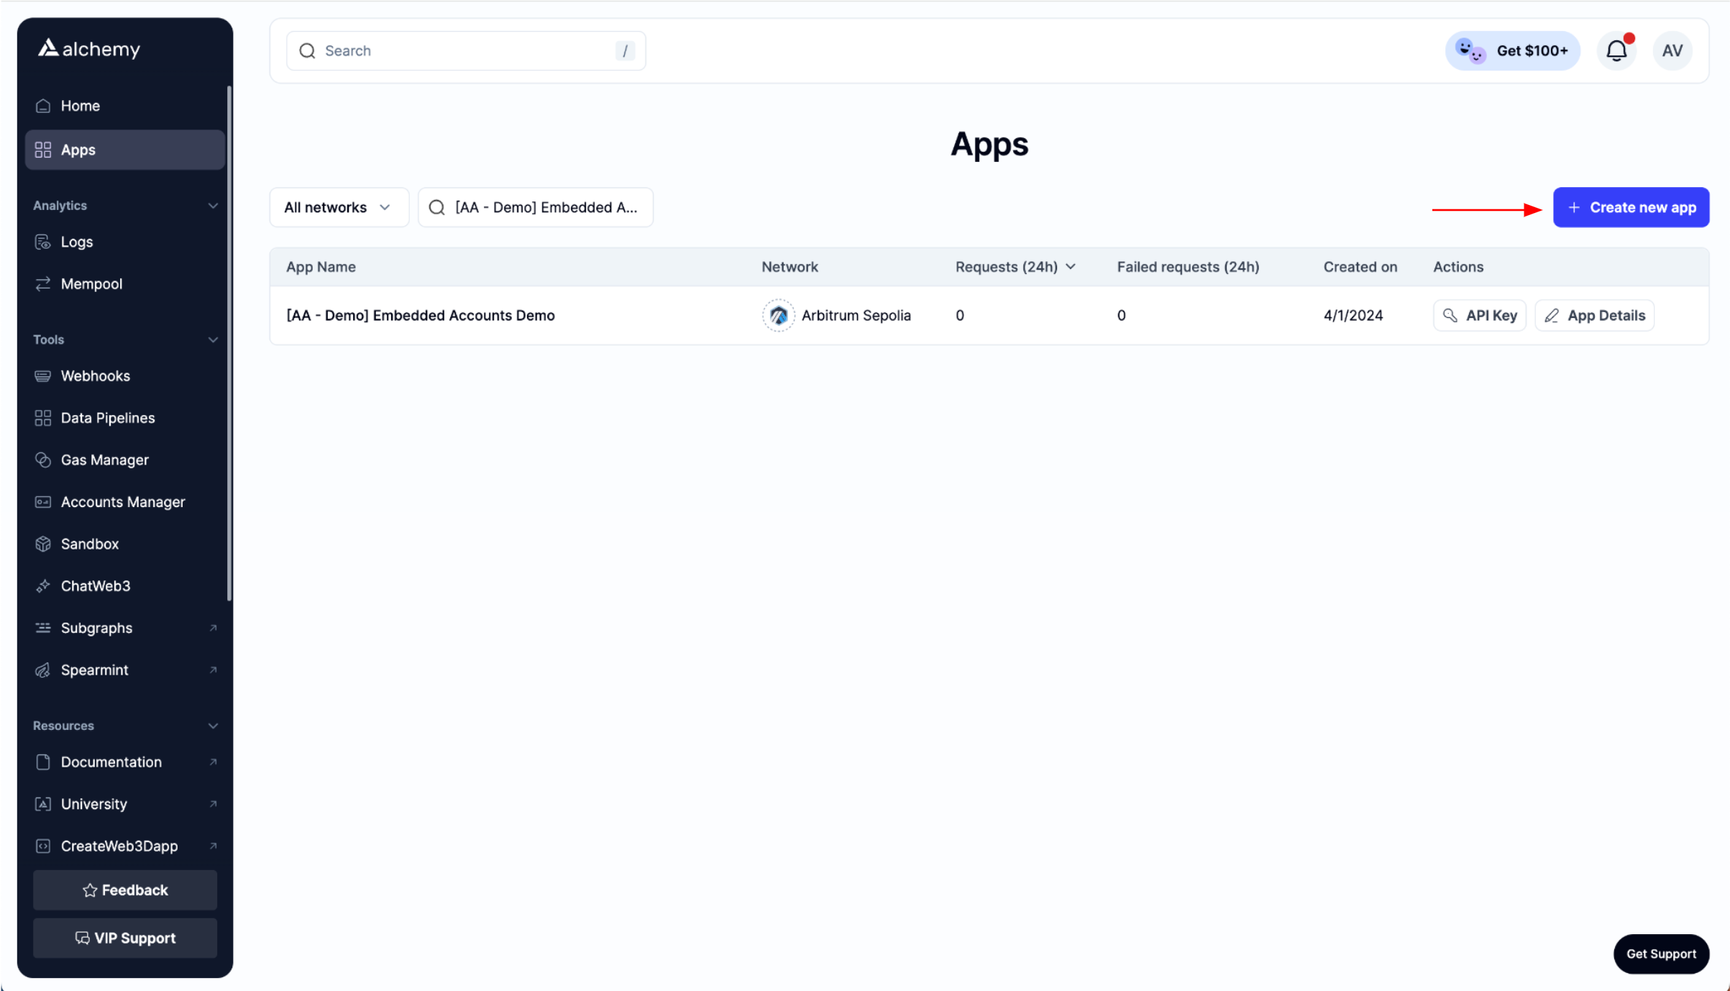
To create an API Key, go to https://dashboard.alchemy.com, sign up for an account, and go through the onboarding. Then on the apps page, click "Create new app" button.
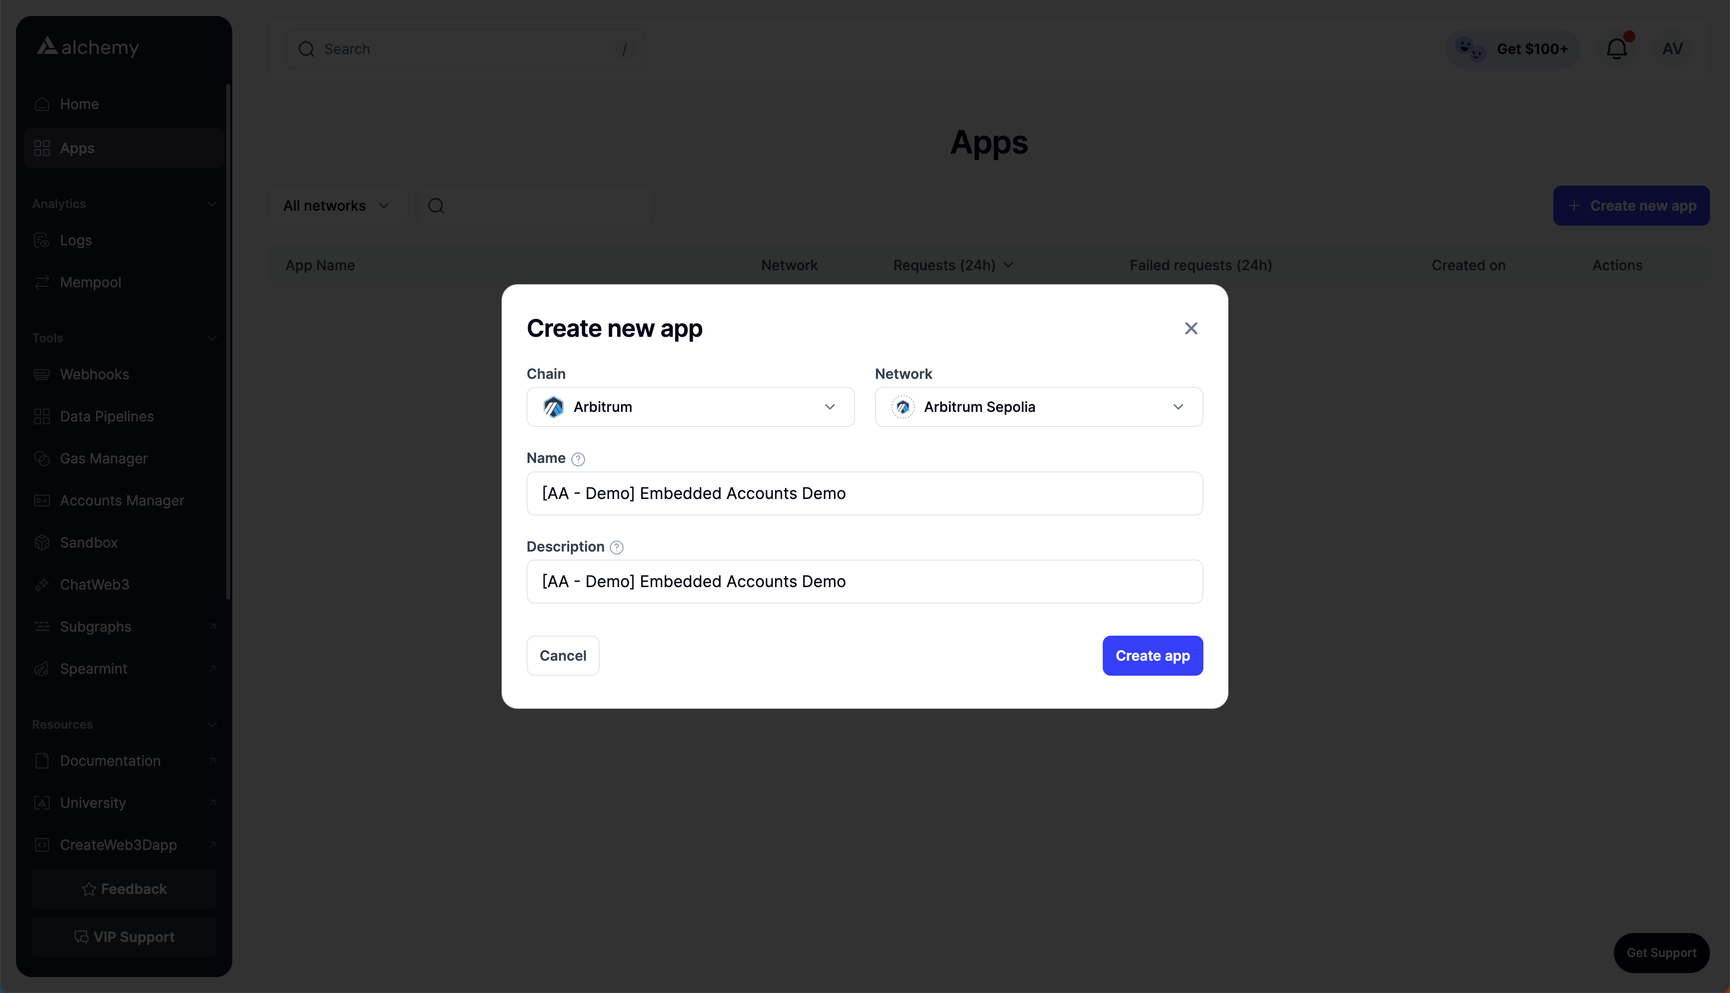
When configuring the Alchemy app, select Arbitrum Sepolia for the network.
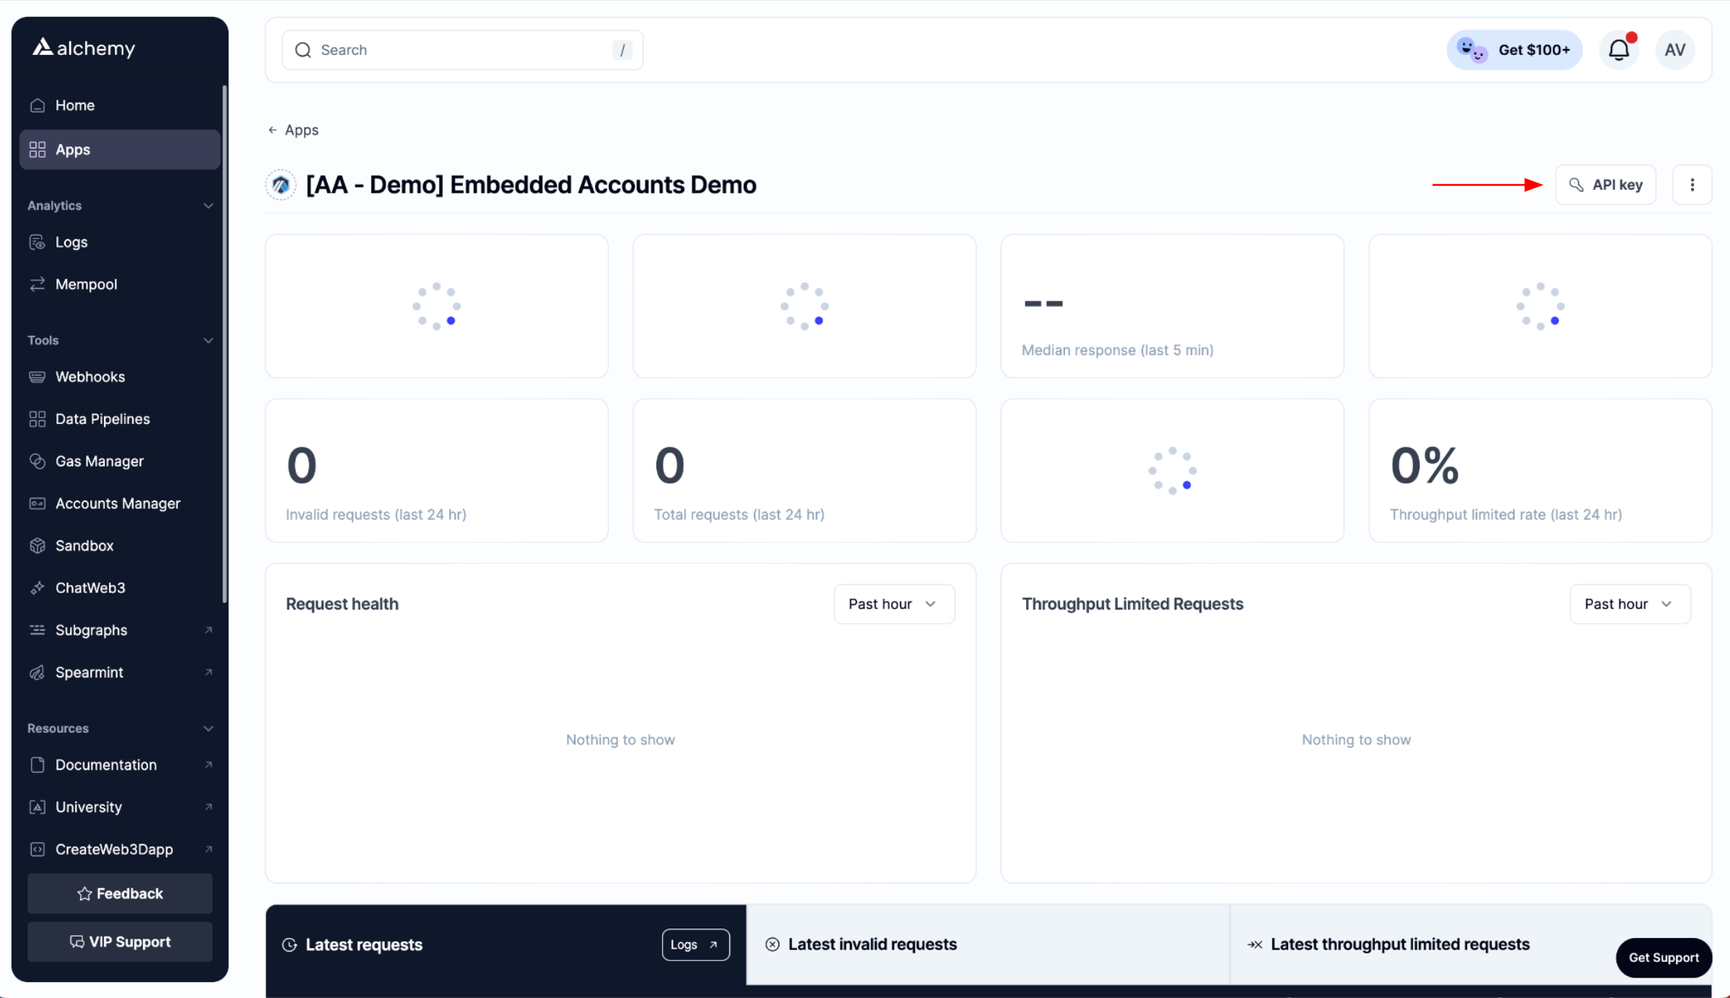
Click the API Key button in the top right corner and copy-paste it into the .env file of your application as an environment variable called ALCHEMY_API_KEY.
Alchemy Embedded Accounts Config
The Embedded Accounts Config enables magic link authentication on your app's domain by configuring the Alchemy Signer, which securely stores the user's private key in a non-custodial secure enclave. It is responsible for authenticating a user via email or passkey using this config, managing a user's session, and signing messages to send UserOperations. Check out the AlchemySigner docs for more details.
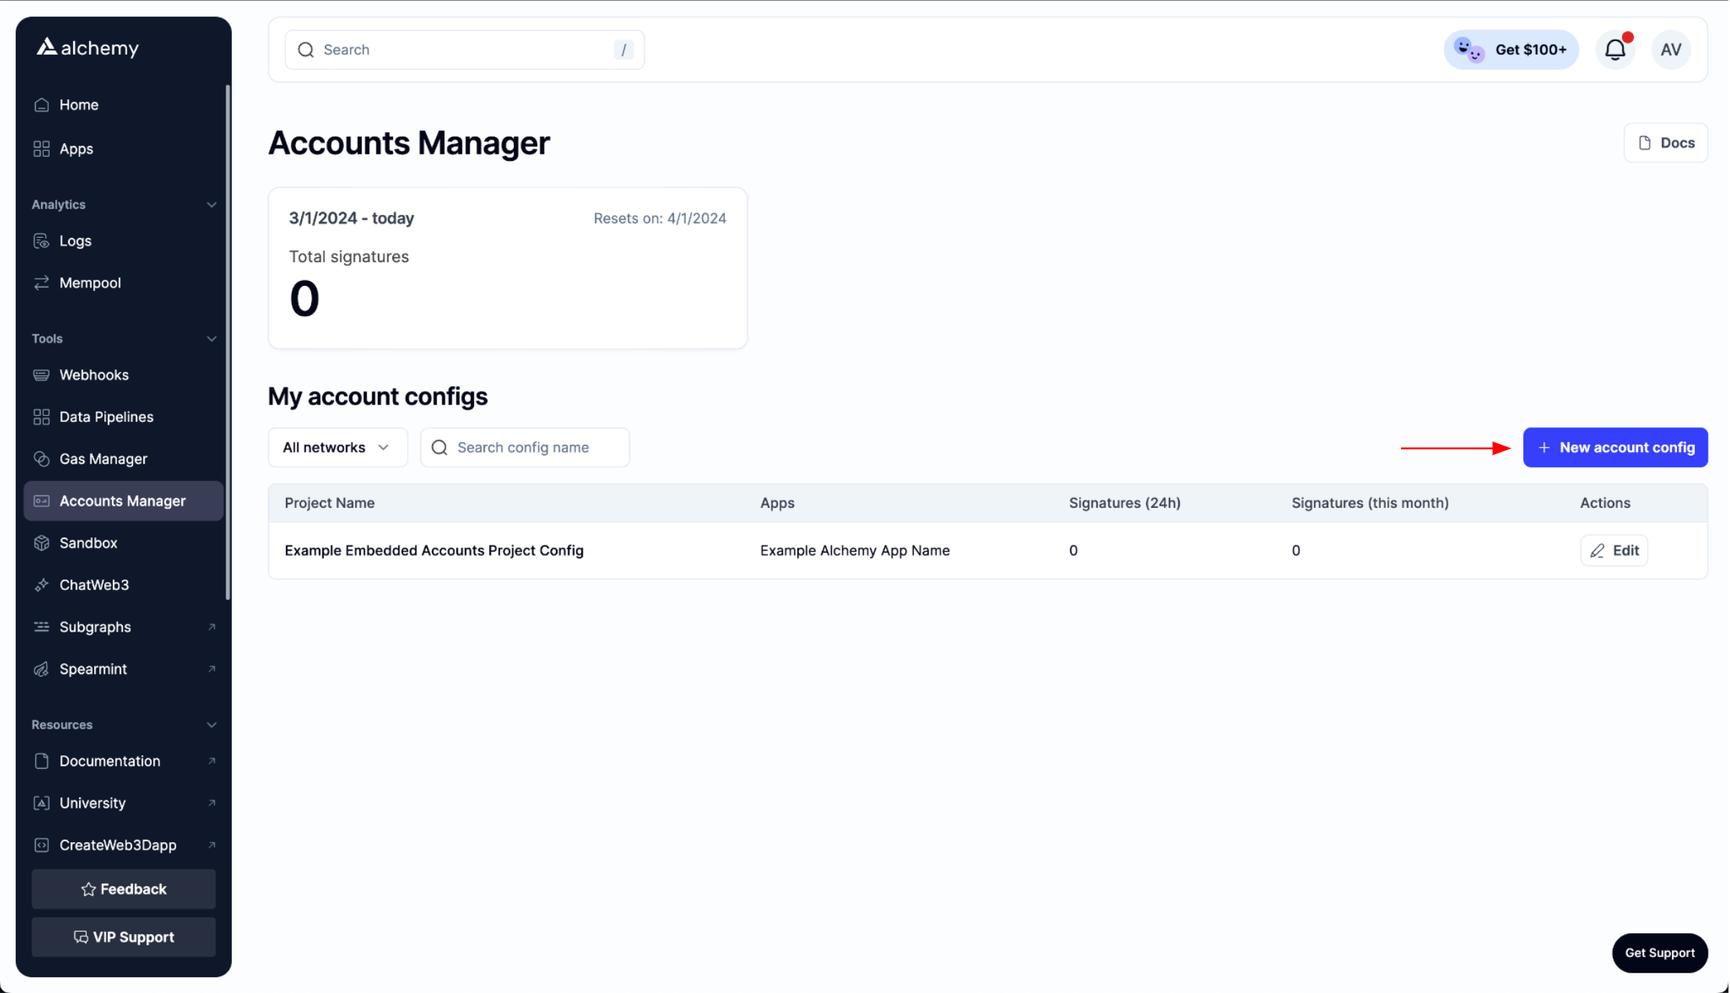
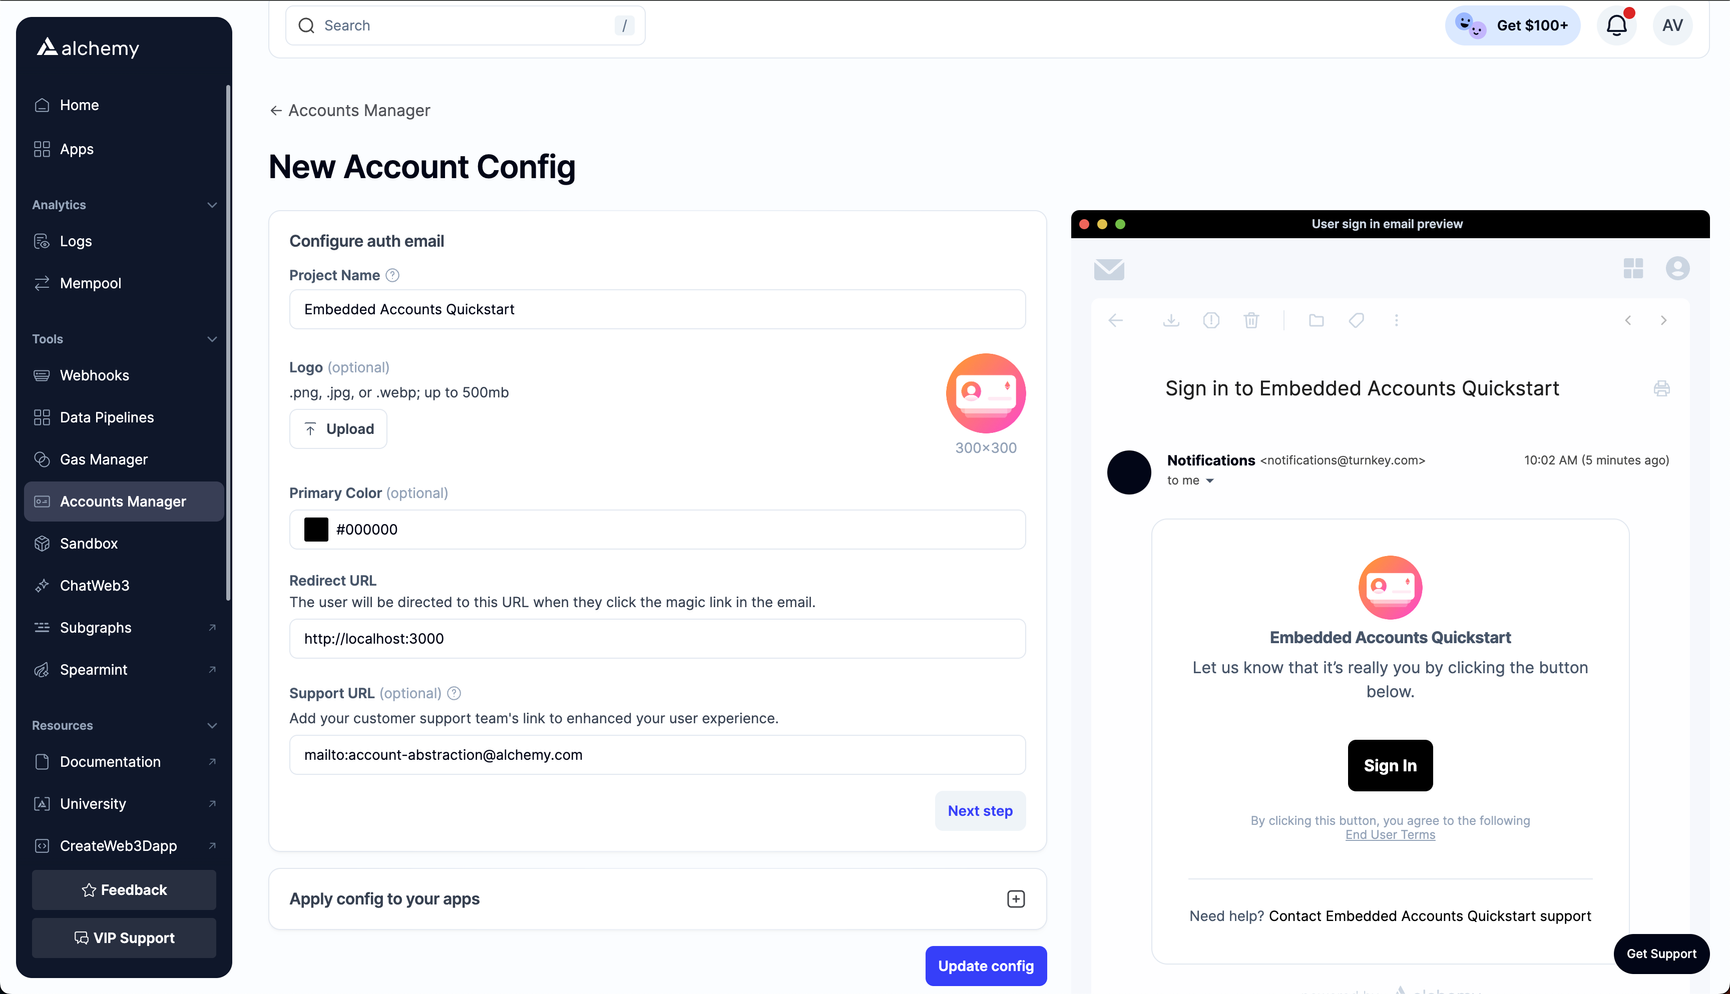
To create an Embedded Accounts Config, go to the embedded accounts page of the Alchemy dashboard and click the “New account config” button.
Then:
- Name your config.
- Set
http://localhost:3000as the redirect URL. NextJS apps by default are hosted locally at port 3000, and you will want to direct the user back to the URL where your application is hosted to authenticate them. - [optional] Customize the logo, “Sign In” button color, and support URL of the email.
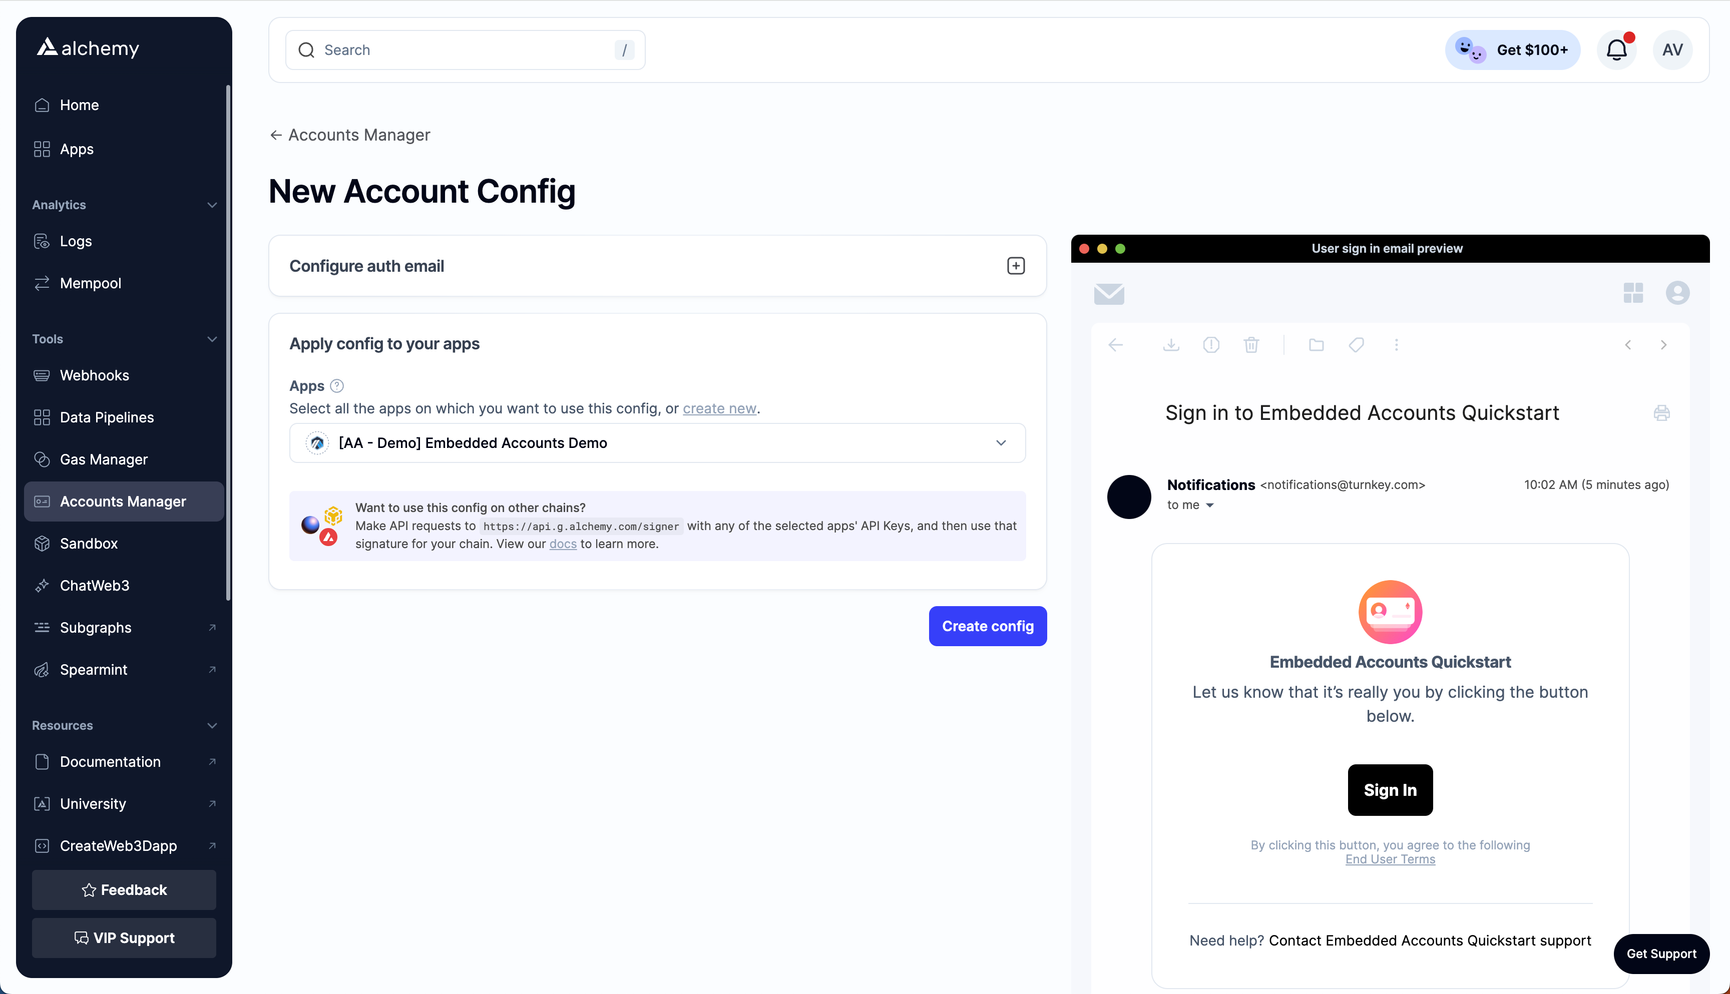
Next, apply this config to the Alchemy App you created in the previous step. Doing this will allow you send requests to Alchemy Signer via the Account Kit SDKs you will install in the next step.
Alchemy Gas Manager Policy
The Gas Manager Policy defines a config for Alchemy's ERC-4337 Paymaster implementation, allowing you to sponsor your users' gas fees. To learn more about Paymasters, check out Alchemy's blog post.
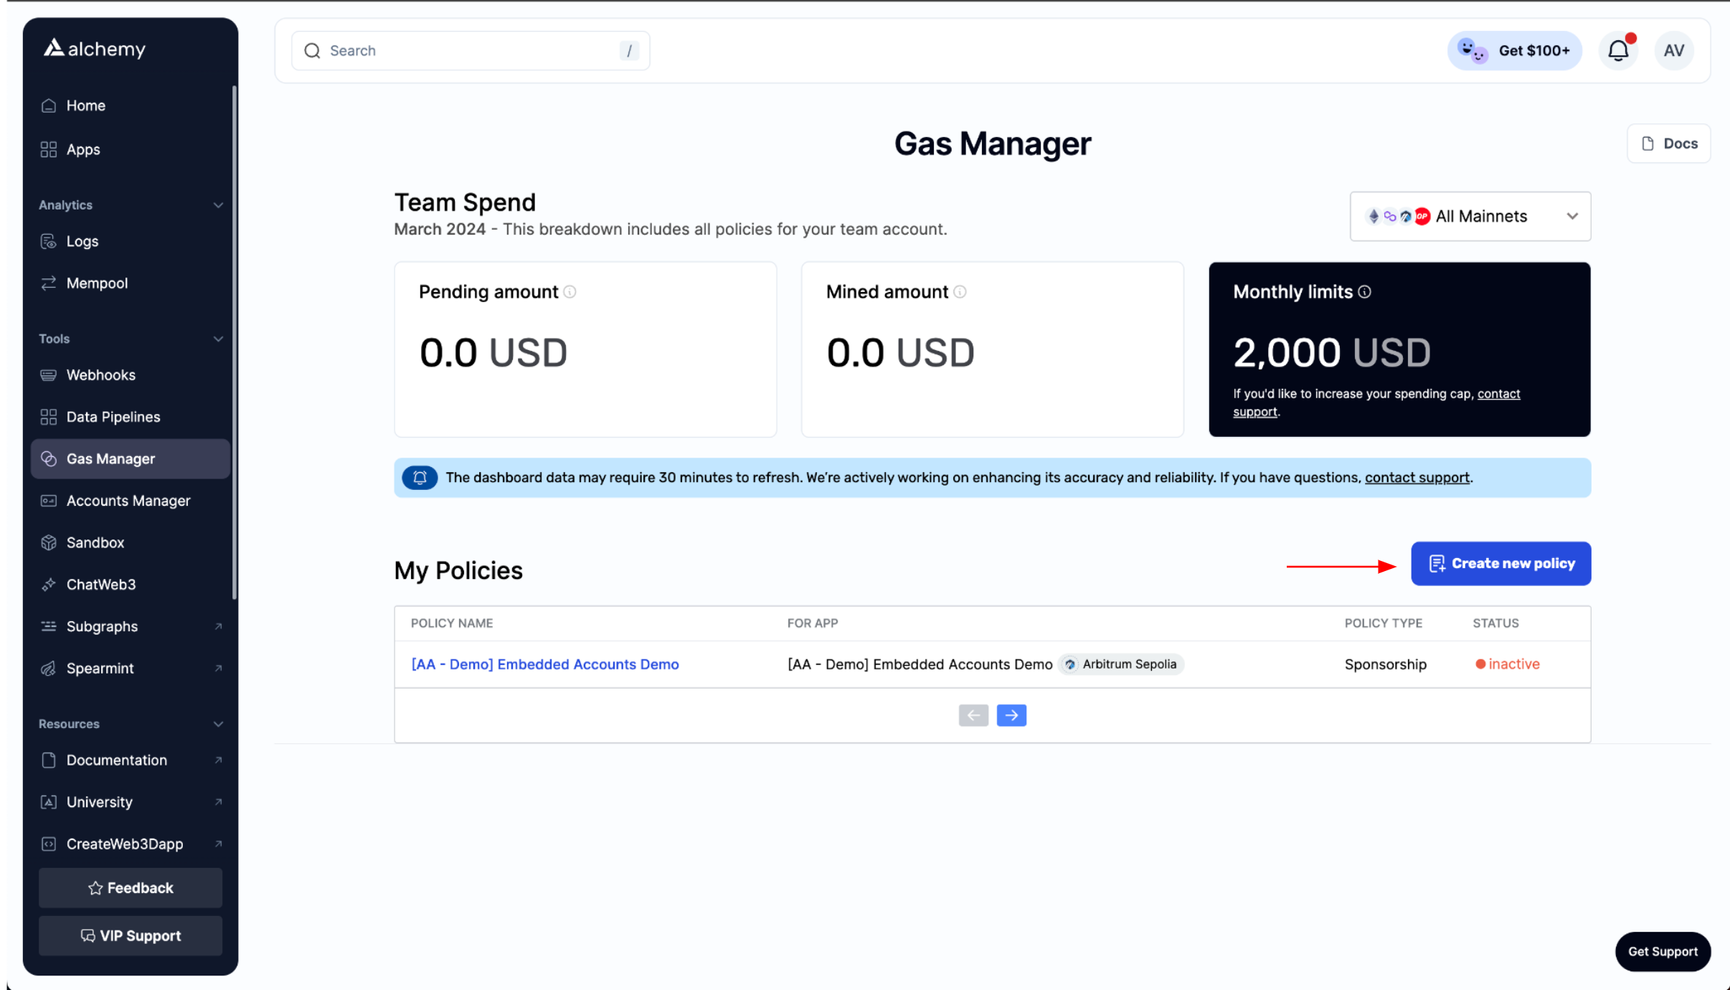
To create a Gas Manager Policy, go to the gas manager page of the Alchemy dashboard and click the “Create new policy” button.
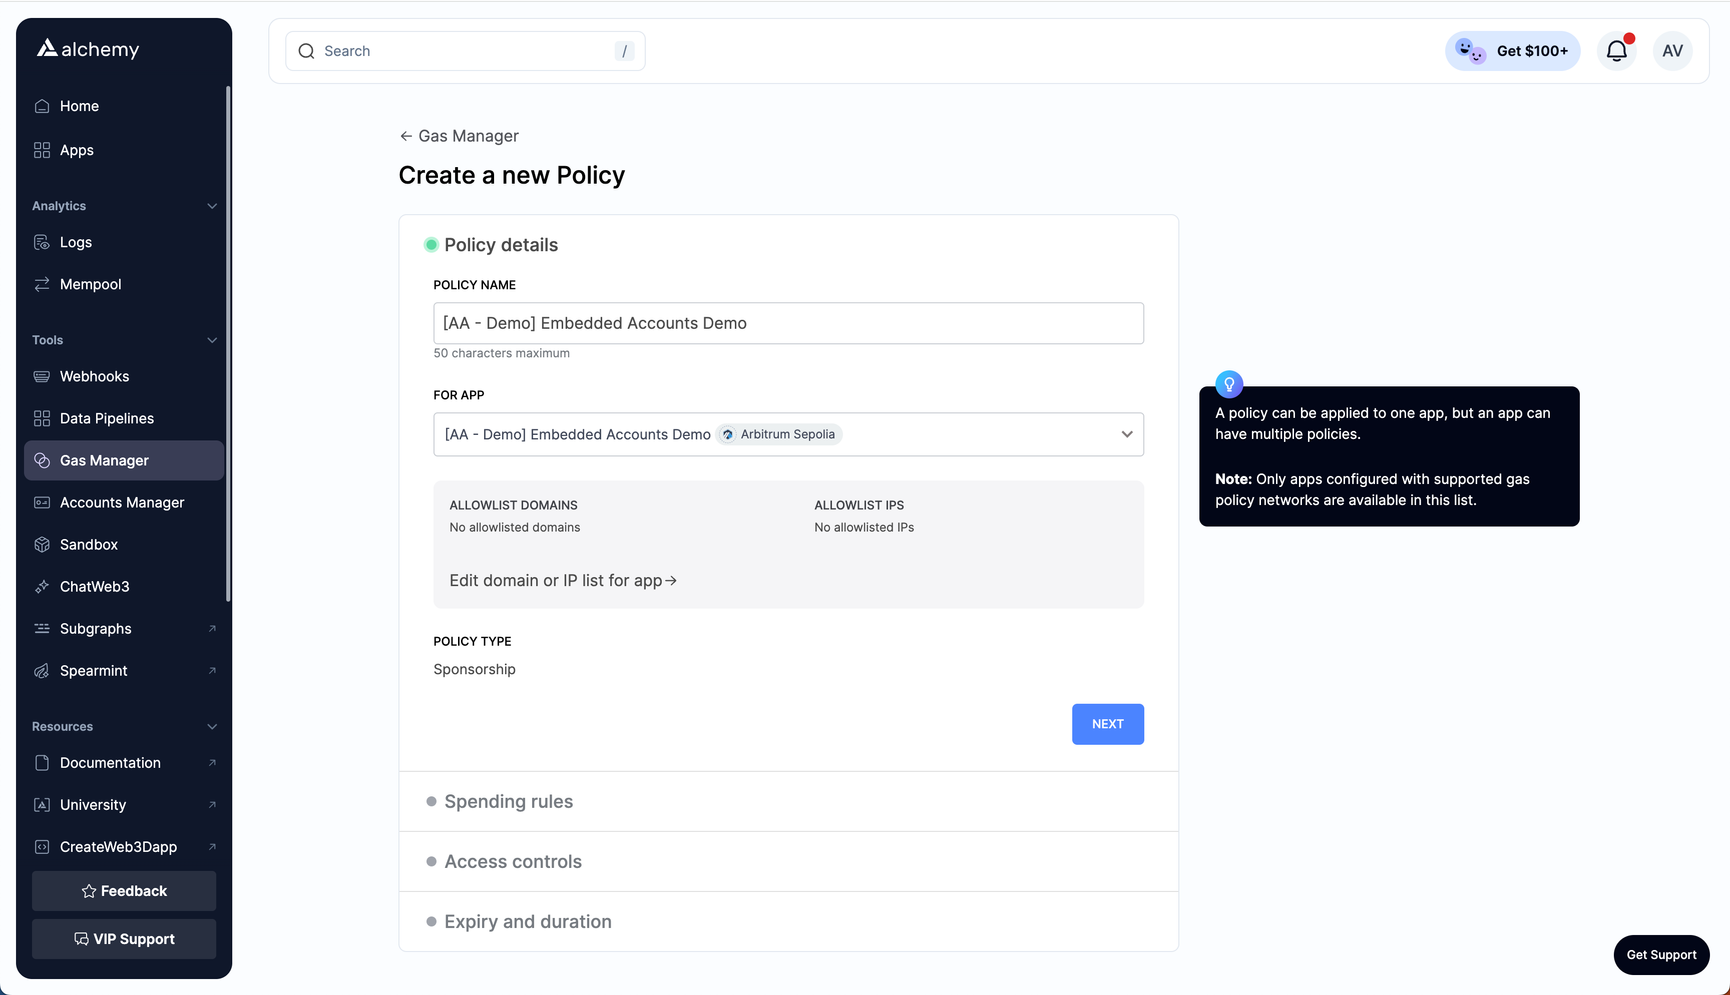
Then:
- Name your policy.
- Associate the policy with the Alchemy App you created in the last step by selecting it in the “Policy details” section.
- Select the default configurations for the remaining sections.
Once you create the policy, copy the Policy ID below the policy's header and copy-paste it into the .env file of your application as an environment variable called NEXT_PUBLIC_ALCHEMY_GAS_MANAGER_POLICY_ID.
Install dependencies
In this newly created directory for your app, add the following dependencies:
npm i @alchemy/aa-alchemy @alchemy/aa-accounts @alchemy/aa-core [email protected] @tanstack/[email protected]The three Alchemy packages - @alchemy/aa-alchemy, @alchemy/aa-accounts, and @alchemy/aa-core - come from the Alchemy Account Kit, and will provide the key building blocks for created Embedded Accounts.
viem is a useful Web3 Utils library and a key dependency of Account Kit.
@tanstack/react-query is a popular library for managing client-side state in NextJS and React applications. You're welcome to use another state management library or vanilla react, but the rest of this demo will use ReactQuery.
Set up your backend
Using your code editor, open your newly created application directory to add the backend! Your application's backend will serve as an API that your frontend will use to send requests to Alchemy's infrastructure to sign messages, send UserOperations, and track your users' Embedded Account activity.
From the root of NextJS project's directory, using the NextJS concept of route handlers, create new directory src/app/api/rpc and add two files: src/app/api/rpc/[...routes]/route.ts to handle calls to the Alchemy Signer, and src/app/api/rpc/route.ts to handle requests to Alchemy's infrastructure. Copy the following into those files.
import { arbitrumSepolia } from "@alchemy/aa-core";
import { NextResponse } from "next/server";

export async function POST(req: Request) {
  // if you want to handle other or multiple chains, you can change this line
  const rpcUrl = arbitrumSepolia.rpcUrls.alchemy.http[0];
  const apiKey = process.env.ALCHEMY_API_KEY;

  if (apiKey == null) {
    return NextResponse.json(
      { error: "ALCHEMY_API_KEY is not set" },
      { status: 500 }
    );
  }

  const body = await req.json();

  const res = await fetch(`${rpcUrl}/${apiKey}`, {
    method: "POST",
    headers: {
      ...req.headers,
    },
    body: JSON.stringify(body),
  });

  if (!res.ok) {
    return NextResponse.json(await res.json().catch((e) => ({})), {
      status: res.status,
    });
  }

  return NextResponse.json(await res.json());
}
Notice that here, you'll be using the ALCHEMY_API_KEY environment variable you set in an earlier step. Also note that the backend routes will make requests to Alchemy's infrastructure for the Arbitrum Sepolia network.
Set up your frontend
Before building your app's UI, you'll want to configure a NextJS router and a ReactQuery client to manage state around requests the app will make, and wrap components that use. From the root of NextJS project's directory, create a file src/app/providers.tsx and initialize these providers.
Then, in the src/app/layout.tsx file that came with the NextJS boilerplate, wrap the children component in the Providers component you just created in src/app/providers.tsx.
These two files should look as follows:
import { cookieToInitialState } from "@alchemy/aa-alchemy/config";
import type { Metadata } from "next";
import { Inter } from "next/font/google";
import { headers } from "next/headers";
import { config } from "./config";
import "./globals.css";
import { Providers } from "./providers";

const inter = Inter({ subsets: ["latin"] });

export const metadata: Metadata = {
  title: "Embedded Accounts Getting Started",
  description: "Embedded Accounts Quickstart Guide",
};

export default function RootLayout({
  children,
}: Readonly<{
  children: React.ReactNode;
}>) {
  // This will allow us to persist state across page boundaries
  const initialState = cookieToInitialState(config, headers().get("cookie"));

  return (
    <html lang="en">
      <body className={inter.className}>
        <Providers initialState={initialState}>{children}</Providers>
      </body>
    </html>
  );
}
Now, you have all the pieces in place to build a new web application using Embedded Accounts! In the next step of this guide, you'll integrate the Alchemy Signer to enable your app to sign users into their newly created Embedded Accounts.